Hello and welcome to another blog hop hoping to inspire to re-create a fabulous triangle box. You may just be starting the hop here with me or joined me through one of the other fabulous ladies below. I’m pleased to say Zoe is recovering very well from her operation so she will soon be back !
We are a little later hopping this month as we have all been enjoying celebrating Stampin’ Up! ‘s 30th birthday celebrations. There were several of the ladies in the hop being recognised for their success during the year so congratulations to you all !
Triangle box inspiration
I’m excited to share my triangle box with you and I will take you on a step by step tutorial so you can easily re-create this at home yourself.
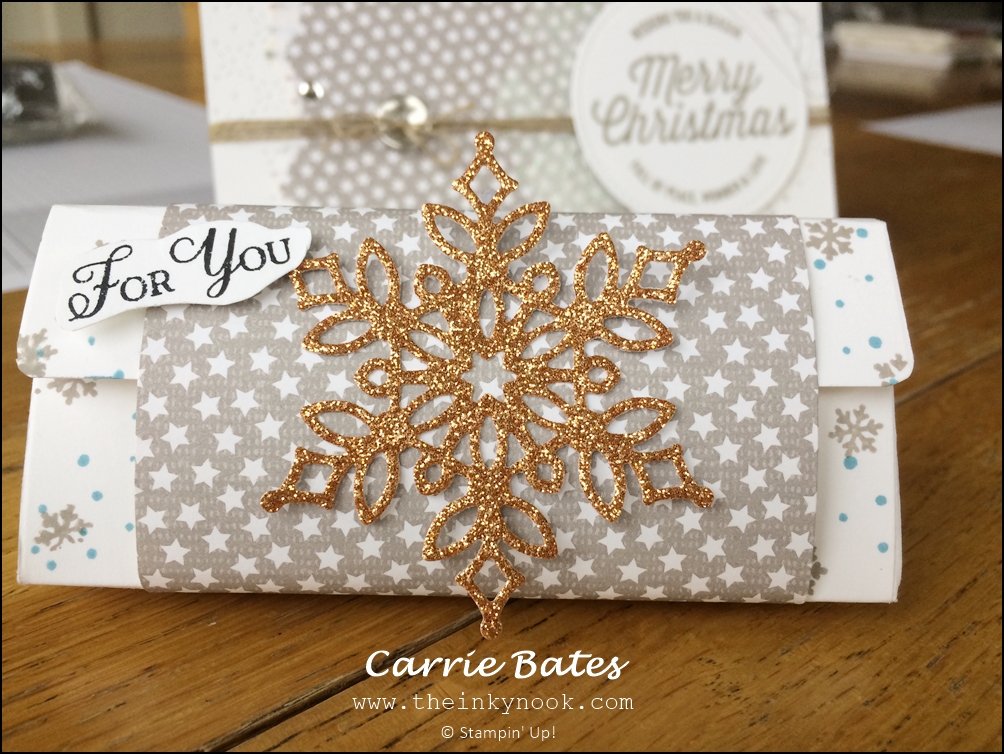
I’ve made this so it big enough to fit a nail varnish or lipstick or perhaps some little chocolates in.
Method
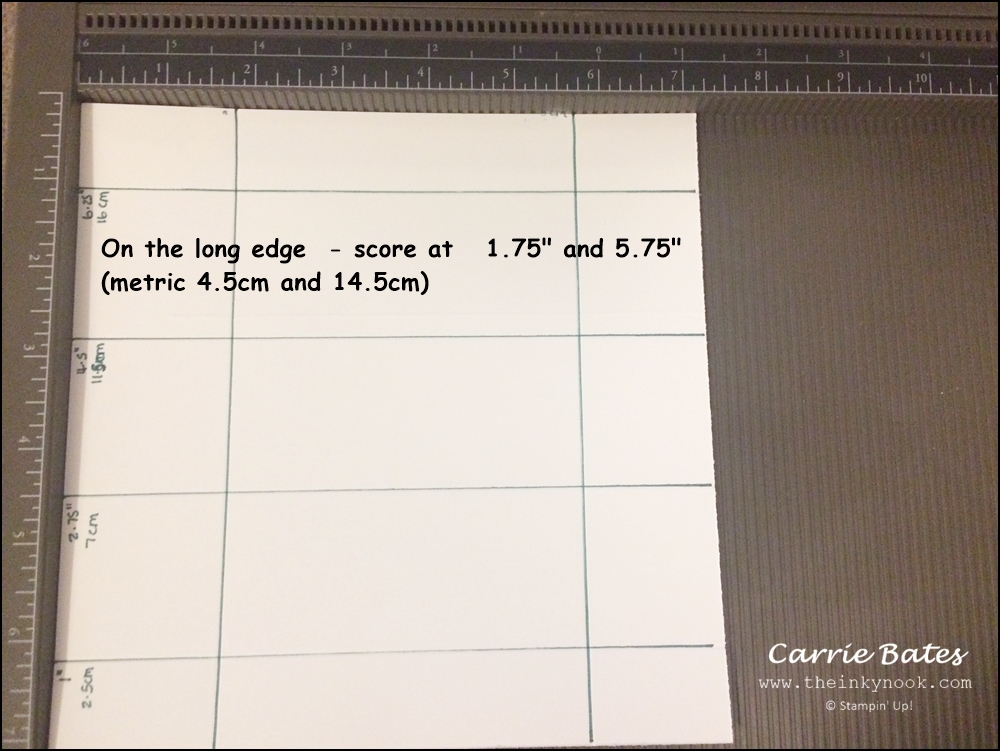
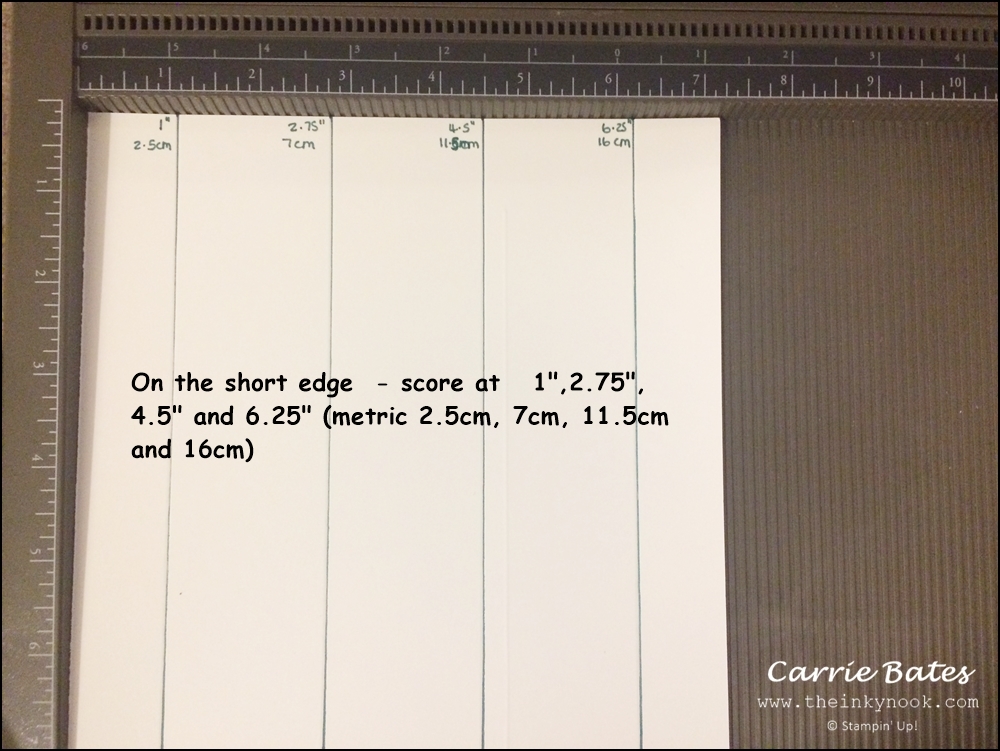
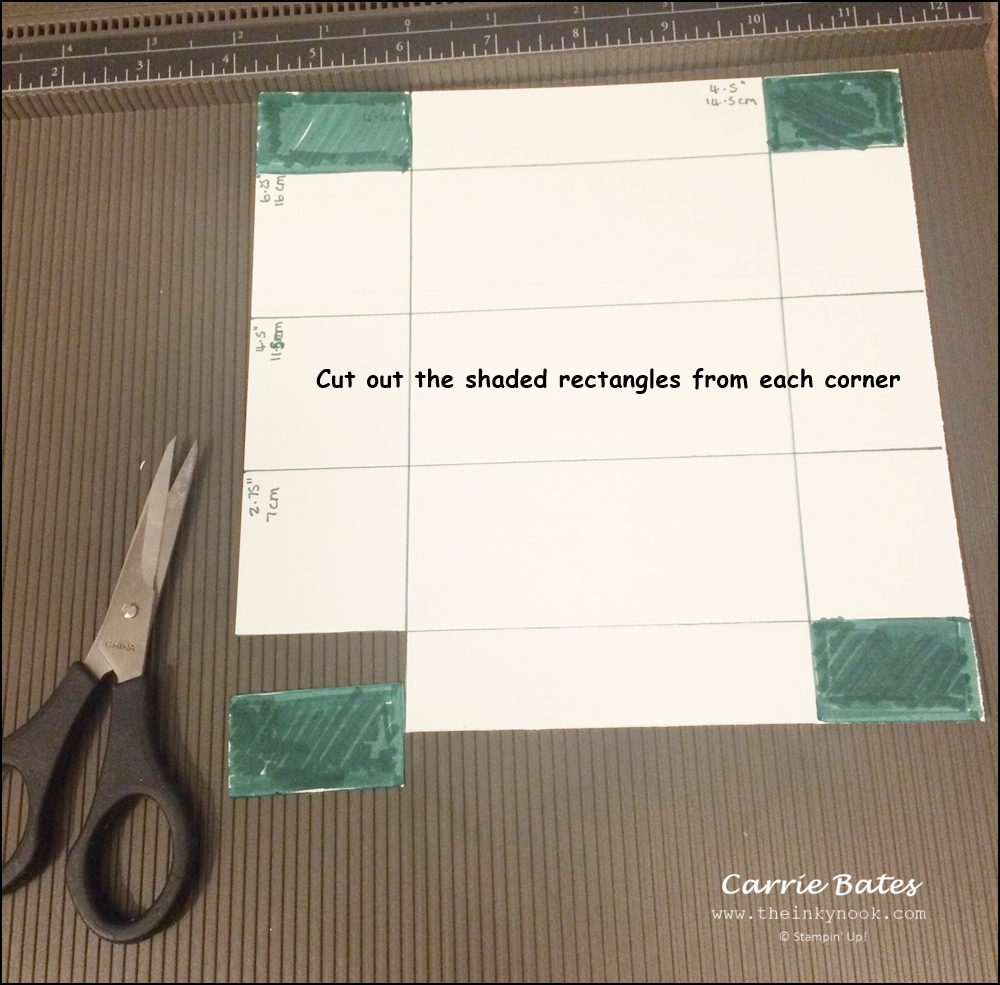
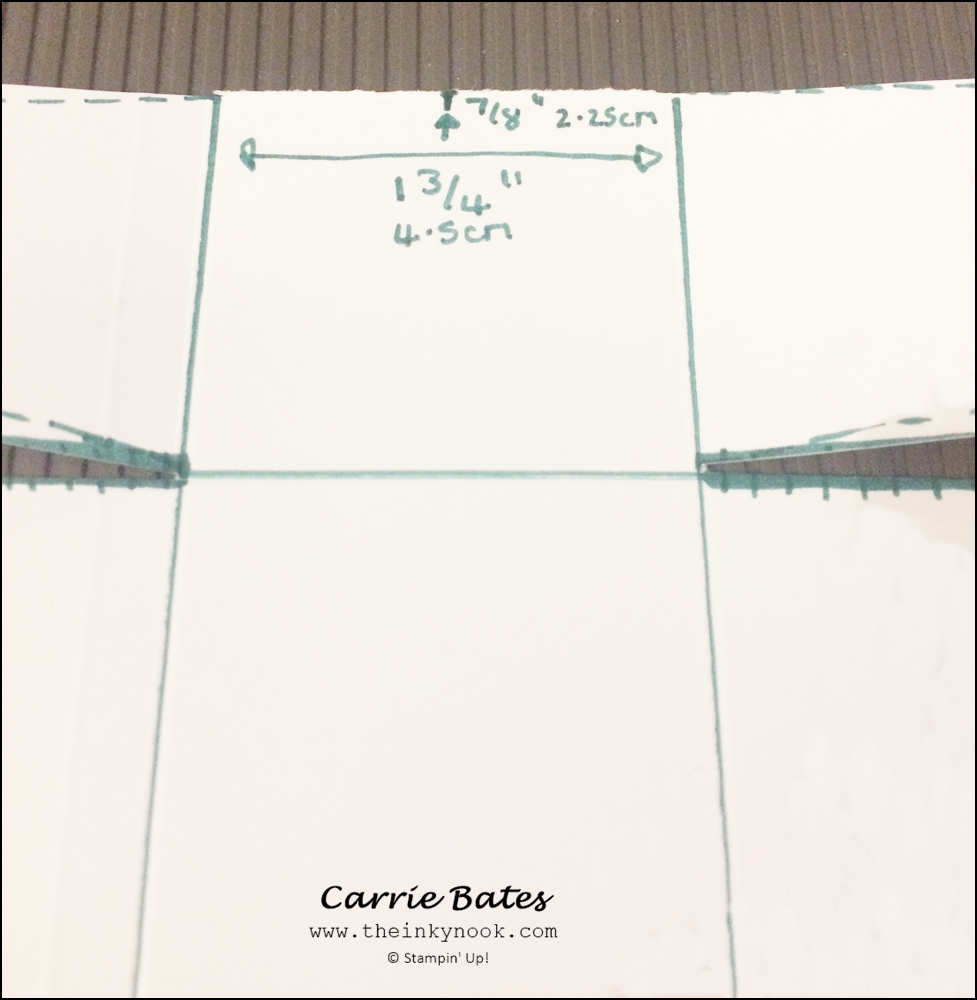
You will need a piece of thick white cardstock measuring 7.25″ by 7.5″ (metric 19cm by 18.4cm) and a piece of designer series paper measuring 3″ x 6″ (metric 4.5cm by 14.5cm). Take the cardstock to begin with and score the long and short edges at the below measurements.
Long edge
Short edge
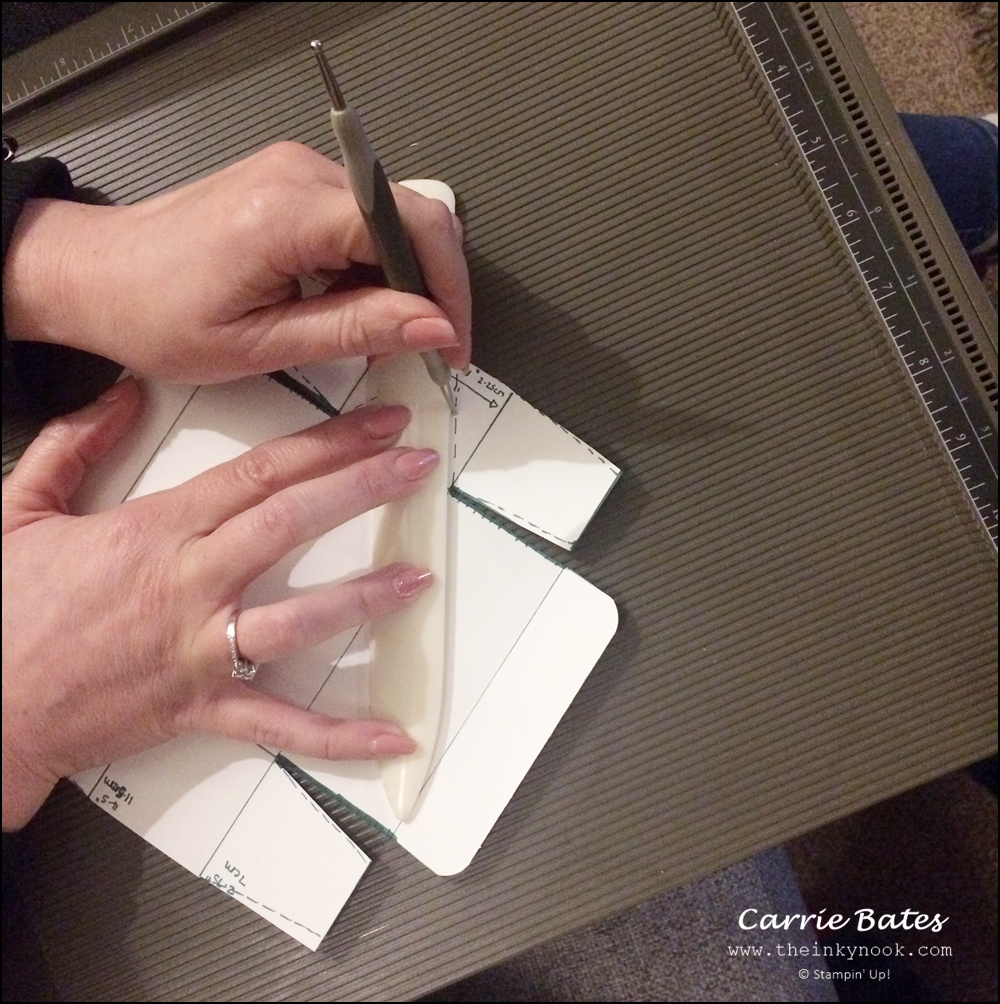
Next you need to remove the small rectangle corners as shown below.
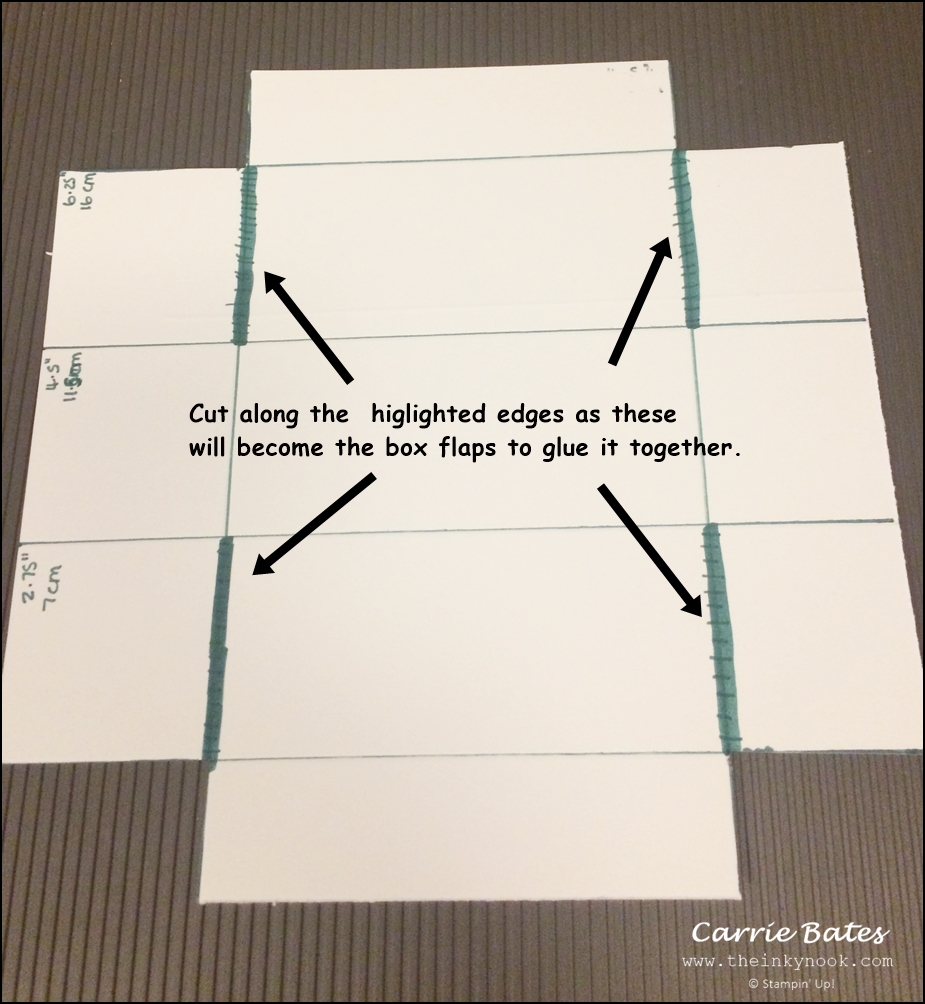
With the corners removed, you need to make the flaps to hold the box together.
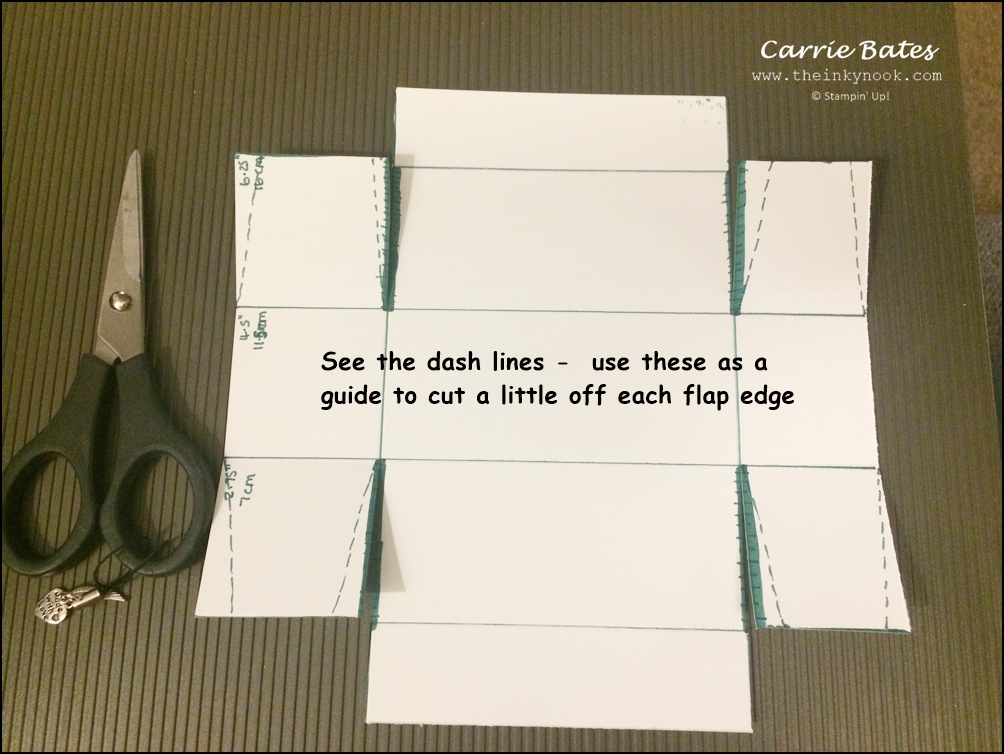
Cut off a small amount from each edge of the 4 flaps as shown by the dash lines in the next picture.
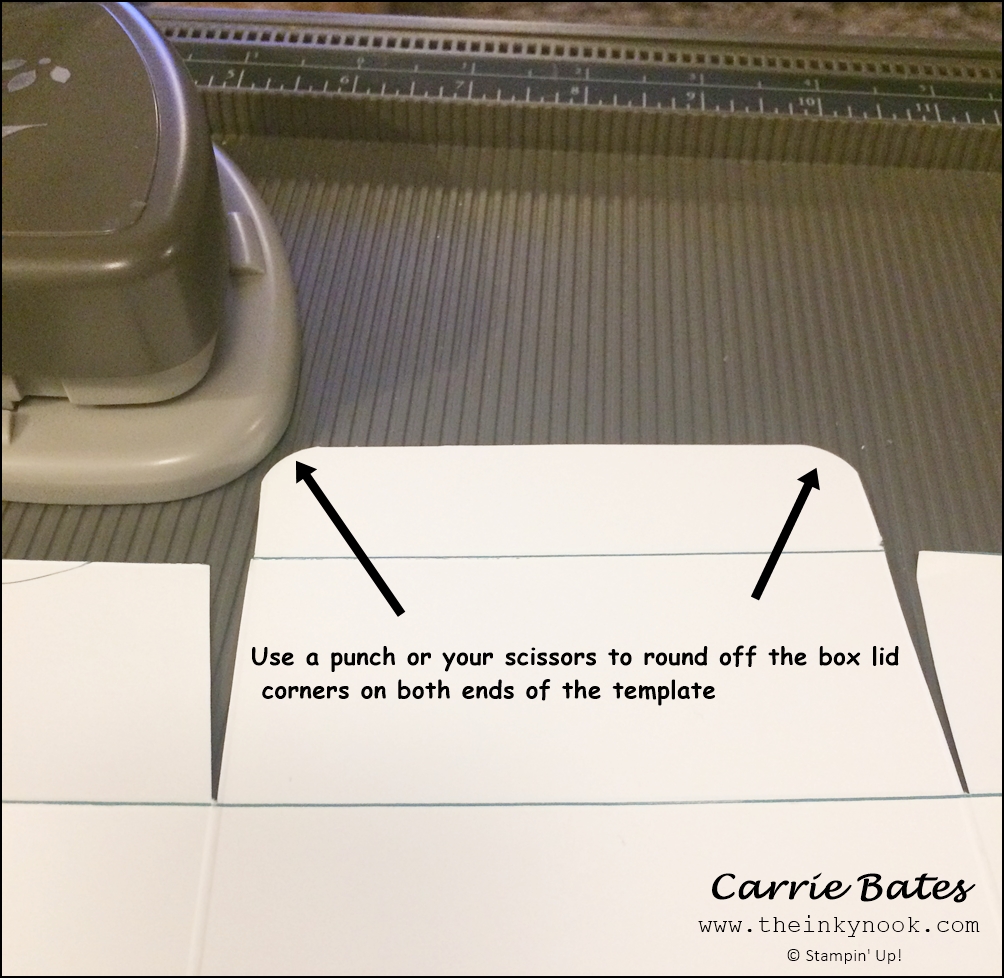
Then round off the corners using a punch or using your scissor as this helps soften the edges and give your finished triangle box a professional looking edge.
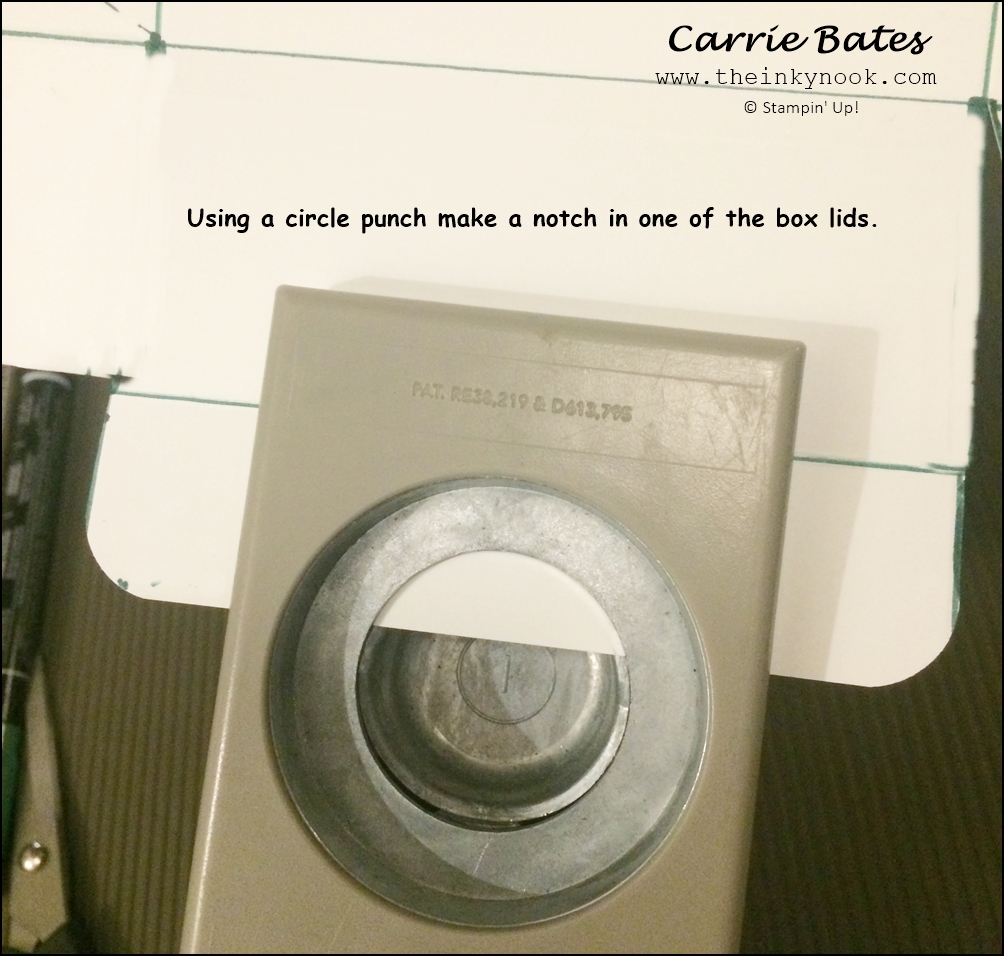
On one of the box lid flaps make a small notch.
Now you need to add the diagonal score lines to create the triangle box ends.
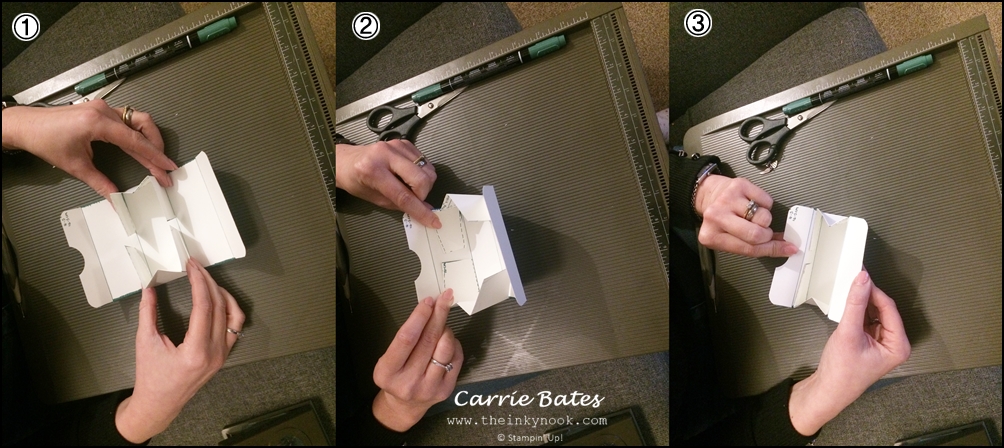
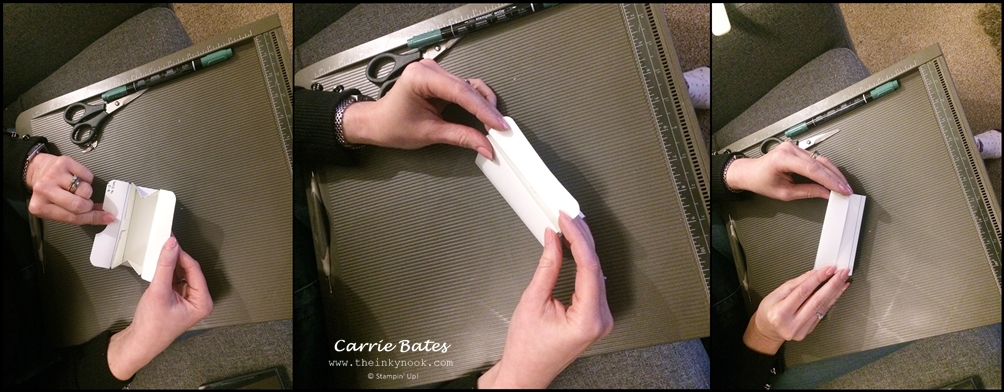
Now if you wish to stamp on the triangle box you should do so before going any futher. Once you’ve stamped then take your double sided tape and pop on the reverse side of the flaps. You can then stick the box together as demonstrated in the below sequence.
Pop your chosen gift inside and then fold the box lid with the circle notch over and down the other side as shown below. The remaining box lid flap can then be folded over and a designer series sleeve placed on top or you could glue it down or use magnets.
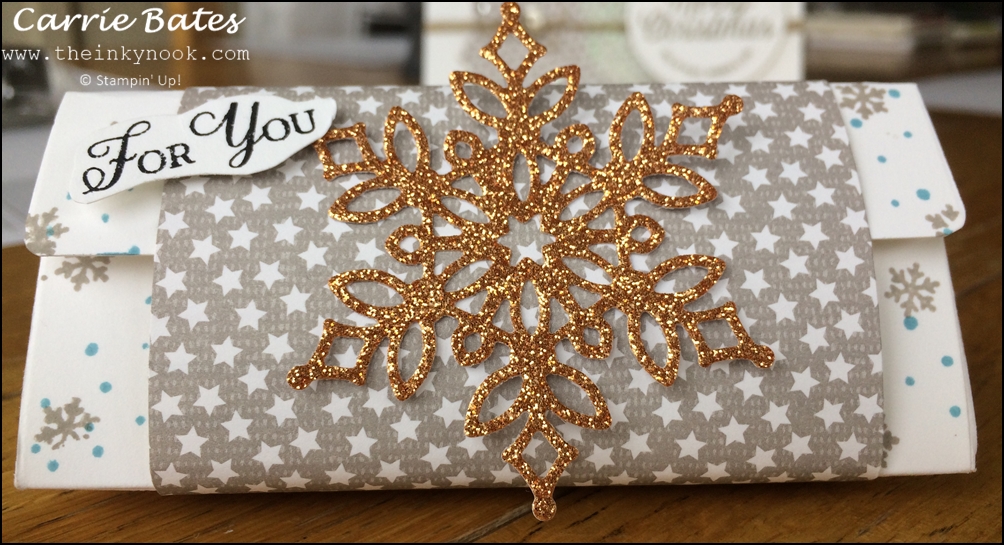
If you want to make the designer series paper (DSP) sleeve mould the DSP around the triangle box and stick the DSP edges together. I’ve then added a little copper glimmer paper snowflake with a sentiment and voila your triangle box is complete !
Thank you
Thank you so much for joining me today – I would love to hear what you thought of today’s tutorial below and feel free to ask any questions. Please do hop by the other ladies via the list below and leave them a comment too. If you’d like to order any of the products I’ve used then after the blog hop list below I’ve included the links for you
Blog list
1. Tanja Kolar
2. Yoshiko Endo
3. Carrie Bates – YOU ARE HERE
5. Dena Rekow
6. Beate Wacker
7. Barb Stewart
Product List


 Designer Series Paper")


Super tutorial Carrie and your box is beautifully delicate and pretty. Zoe x
Thank you so much Zoe – I love the challenges that these ladies keep setting !
Inky hugs,
Carrie
A lovely project – beautifully explained and great photographs. Thanks Carrie! Will try this one soon methinks ?
Hey Lauren – thank you for your kind words and I’d love to see what you make when you do have a go !
Inky hugs,
Carrie x