Hey there and welcome to our first Stamptastic Friends blog hop of 2026! Our theme is gratitude and I love to make simple thank you cards for friends and customers. So let’s get started and get your creativity inspired today.
Simple thank you card steps
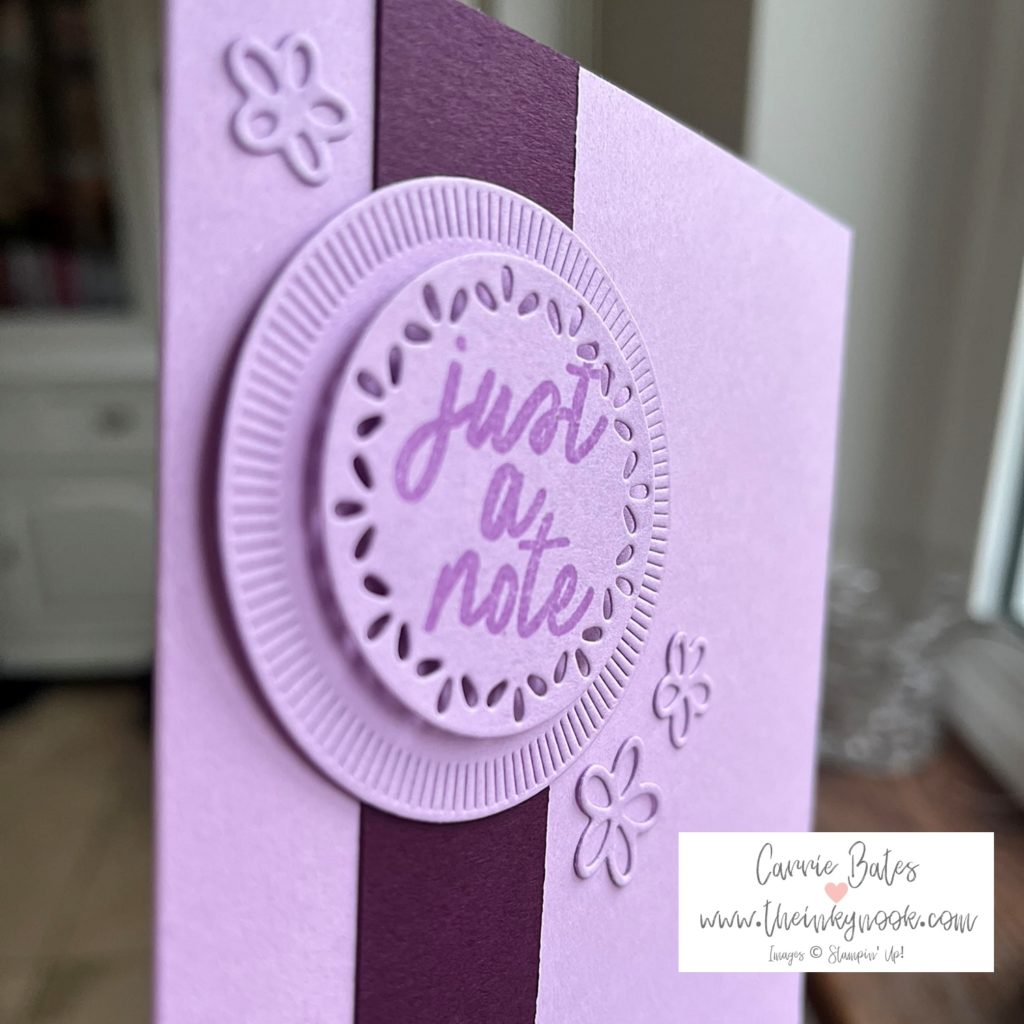
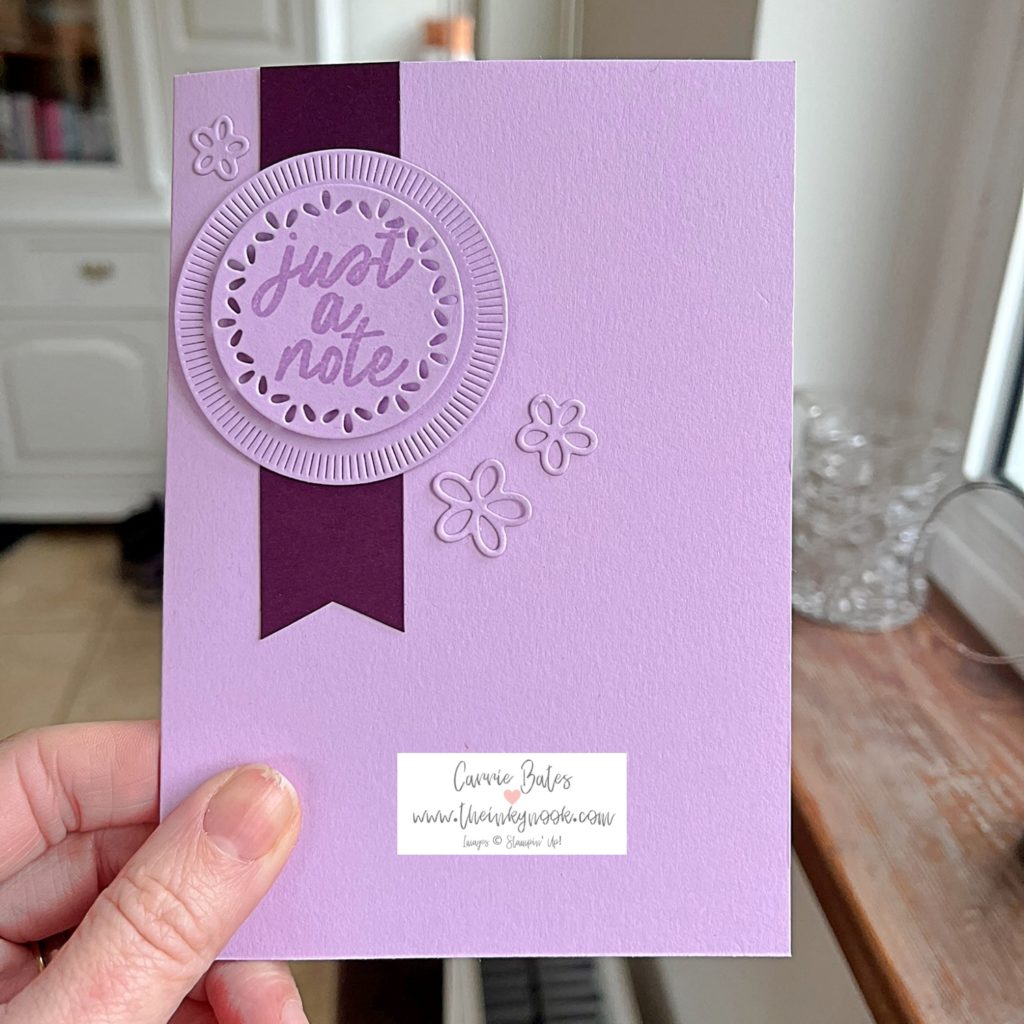
The first step is to cut your card base from a sheet of Fresh Freesia cardstock measuring 14.9cm by 21cm and scored on the long side at 10.5cm.
Using some more Fresh Freesia cardstock stamp the greeting in Versamark and then use clear embossing powder on topand the heat tool to set it. By using clear powder it looks like you’ve stamped the greeting in the colour of the cardstock underneath. This is a great tip if you don’t have the ink pad to match the cardstock colour you are using.
Spotlight on nature dies steps
Using the dies you can now cut out the greeting and another decorative circle to act as a frame behind it. I popped dimensionals on the back of both circles ready to fix to the card after the next step.
I made a banner flag from a contrasting darker shade of purple and Blackberry Bliss is perfect for this. To create a similar banner flag the piece of cardstock should measure roughly 10cm by 2.5cm. The banner flag is cut using a pair of scissors to snip a triangle at one end of the strip. I glued this into place in the top left hand corner and then secured the greeting on top of this.
Finishing steps
I haven’t used any embellishments but I die cut some little flowers using the Swirled Designs dies but you could use some little adhesive jewels if you have some of those to hand.
Thanks for joining me today and I hope you will visit the rest of the ladies in the hop and I’ll see you next time.
Inky hugs, Carrie x
Product List![Simply Said Mix & Match Photopolymer Stamp Set (English) [ 163756 ]](https://assets1.tamsnetwork.com/images/EC042017NF/163756s.jpg "Simply Said Mix & Match Photopolymer Stamp Set (English) [ 163756 ]")
![Spotlight On Nature Dies [ 163580 ]](https://assets1.tamsnetwork.com/images/EC042017NF/163580s.jpg "Spotlight On Nature Dies [ 163580 ]")
![Fresh Freesia A4 Cardstock [ 155614 ]](https://assets1.tamsnetwork.com/images/EC042017NF/155614s.jpg "Fresh Freesia A4 Cardstock [ 155614 ]")
![Basic White A4 Cardstock [ 166781 ]](https://assets1.tamsnetwork.com/images/EC042017NF/166781s.jpg "Basic White A4 Cardstock [ 166781 ]")
![Versamark Pad [ 102283 ]](https://assets1.tamsnetwork.com/images/EC042017NF/102283s.jpg "Versamark Pad [ 102283 ]")
![Basics Wow! Embossing Powder [ 165679 ]](https://assets1.tamsnetwork.com/images/EC042017NF/165679s.jpg "Basics Wow! Embossing Powder [ 165679 ]")
![Heat Tool - Eu Plug [ 129055 ]](https://assets1.tamsnetwork.com/images/EC042017NF/129055s.jpg "Heat Tool - Eu Plug [ 129055 ]")
![Multipurpose Liquid Glue [ 110755 ]](https://assets1.tamsnetwork.com/images/EC042017NF/110755s.jpg "Multipurpose Liquid Glue [ 110755 ]")
![Stampin' Dimensionals [ 104430 ]](https://assets1.tamsnetwork.com/images/EC042017NF/104430s.jpg "Stampin' Dimensionals [ 104430 ]")