Welcome to week 2 of the Tantalizing Stampers fun DSP blog hop where I am using the Forever Greenery designer series paper for my projects. I’ve made 2 quite different cards to share the first being for a beginner crafter and the second more for an experienced crafter.
Daisy Lane meets Forever Greenery DSP
My first card uses a Garden Green card base topped with a piece of DSP measuring 14.4cm by 10cm. Next I created a banner across the card using a strip from another piece of Forever Greenery designer series paper. This was topped with a strip of Garden Green cardstock which is wrapped in both ribbons from the combo pack. Before gluing the banner to the card I did tie a bow in the gold metallic trim.
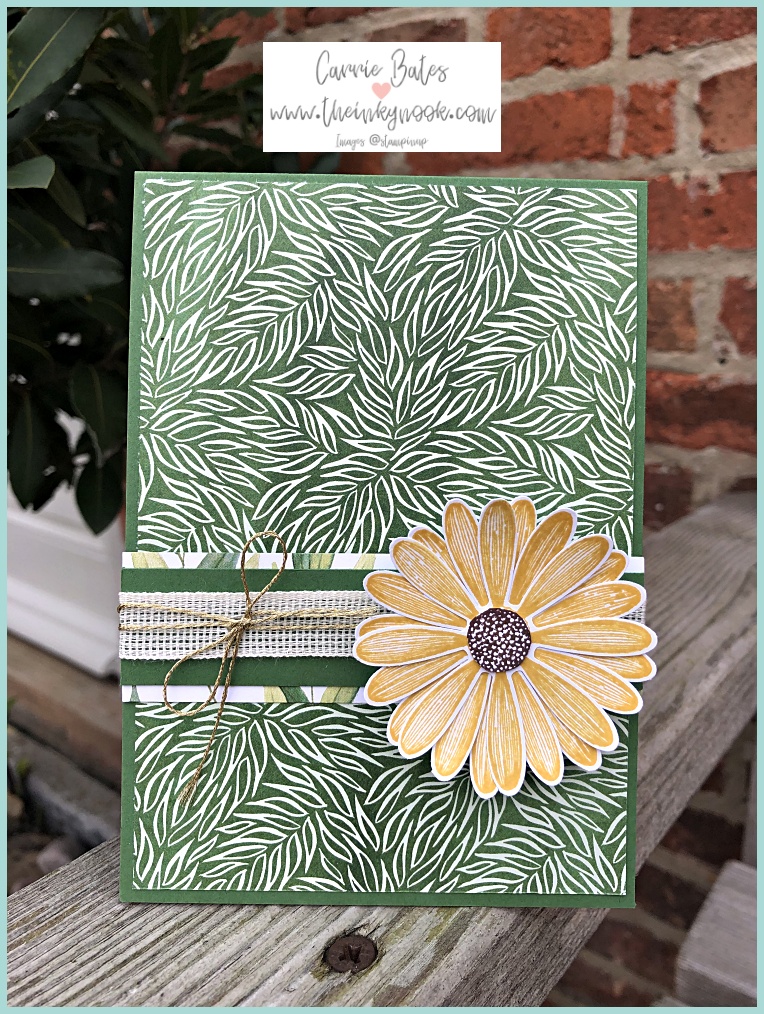
Meanwhile I stamped the big daisy from the Daisy Lane stamp set three times in Bumblebee before punching them out with the Daisy punch. They are glued together with multipurpose liquid glue and layered up. Finally I stamped one daisy in Early Espresso and cut out the pollen centre and glued to the top daisy flower. I think it looks more like a sunflower now and I CASE’d this from Mikaela Titheridge from her Facebook live last week.
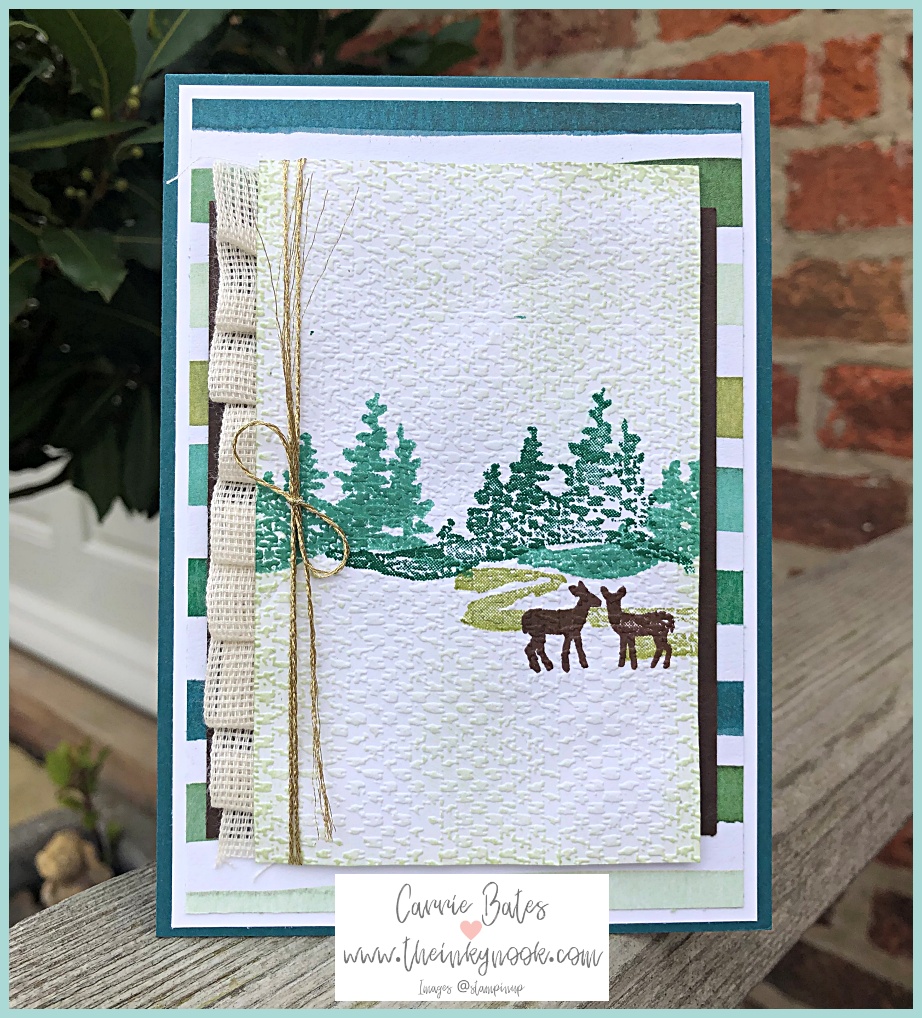
Snow Front stamp set meets Forever Greenery DSP
This card requires more effort and experience but is worth every bit of work ! I took a Pretty Peacock card base topped with a whisper white layer measuring slightly smaller than the card front. Following up with another piece of Forever Greenery DSP on top of that. Next I embossed a piece of white cardstock measuring 11.9cm by 7.5cm with the Tasteful Textile embossing folder.
Time to stamp
The next step is to stamp the trees, path and deer to create a woodland scene. Using a sponge, I dabbed it onto my Pear Pizzazz ink pad and then smoothed it over the whole embossed white layer. I wrapped the gold twine around the layer and tied it in a bow to fix it in place. Behind this layer I ruffled the Very Vanilla weave ribbon which is held in place with Stampin Seal. I framed this with Early Espresso cardstock as a border edge and then used dimensionals to fix it on to the DSP.
I hope you like the cards I’ve created and if you have time to leave me a comment below I’d love to hear your thoughts. Don’t leave the hop without popping by to see what the other ladies have created using the links below.
See you again next week !

Snow Front card products


Super cards Carrie and love the linking with other stamps and embellishments. Zoe x
Thanks Zoe – I wanted to give people some different ways of using their DSP. It’s fun to try something different to your normal style isn’t it.
Inky hugs,
Carrie x
I especially love the one with the deer scene – beautifully rich layering x
Thanks Lauren – I hadn’t started off with the intention of using the Snow Front stamp set but I think it really works here 🙂
Inky hugs,
Carrie x
I am loving the snowy look ?
Hi Karen – thanks for visiting today and I’m glad you like the snow front card. Hopefully I have inspired you to try having a go !
Inky hugs,
Carrie x
Ohhh such lovely cards Carrie! Love all the little details and the way you used the ribbon on the second card. Love the countryfeel of the first card too! Great use of the paper! It is so versatile and you really showed that!
Thank you for your lovely comments Annette – I love sharing ideas to inspire others as much as you do !
Inky hugs,
Carrie x