Hi there I’m Carrie and I love to craft and be creative. This weekend has been full of learning and crafting with some of my global demonstrator friends. Onstage at home is a virtual global gathering of demonstrators ranging from hobby demos to business demos. My team love to come along and we have a whatsapp group to chat as we watch the online presentations. I think our favourite part is getting to see the new products and then craft with them together. For me, I have made friends across the globe and we stay in contact and support one another.
In 2022 we will have virtual OnTour in April followed by in person Onstage Live in Austria in November. I am excited to work towards Austria now as in 2015 I got to go to Brussels which was amazing.
As part of onstage at home we get the opportunity to order a swag box. This contains lots of Stampin’ Up! goodies and some new product. These are limited in supply so if you don’t get one we get given a suggested list of current products we could use instead. The projects I am sharing today use the Hand Penned Petals suite which are one of my current favourites.
Onstage at home cards I made
Card 1 – using a sponge dauber for a watercolour effect
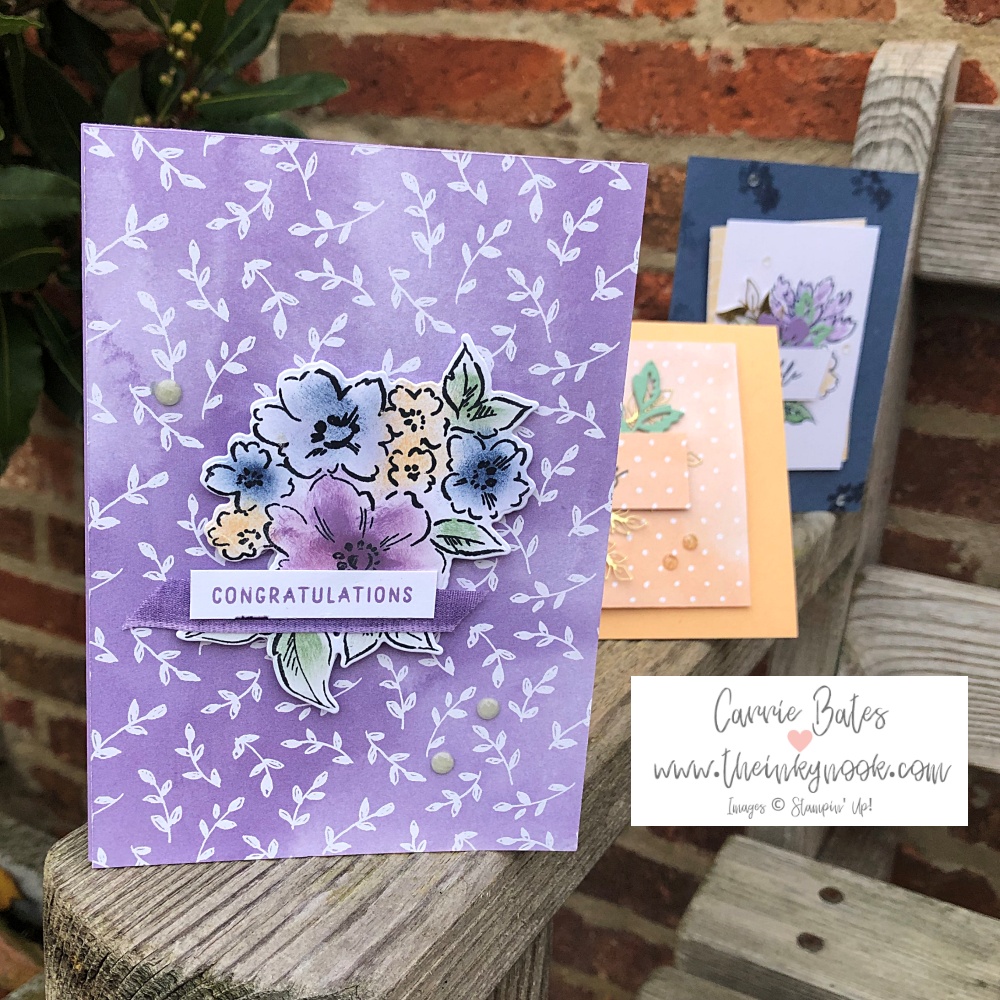
- Cut a Highland Heather card base measuring 14.9cm by 21cm and score at 10.5cm along the long edge
- Cut a piece of designer series paper measuring 14.9cm by 10.5cm. Next stick this to the front of the card base.
- Stamp the large floral image from the Hand Penned stamp set using memento black ink.
- Stamp your greeting in a co-ordinating colour and I used Highland Heather and cut down to a label.
- Cut a piece of co-ordinating ribbon measuring about 10cm. I created mine by applying Highland Heather ink with a sponge dauber to white faux linen ribbon
- Colour in your floral image by using a sponge dauber tapped on your ink pad to pick up the ink followed by sweeping motions from the centre of the flowers out along the petals. For the leaves I repeated the process but started from the bottom of the leaf working upwards. This is a great way to have a watercolouring effect on your stamped images. You are in control of the depth and tone of the colouring as if you want a deeper tone you can repeat the colouring process.
Card 2 – using diecuts and layers
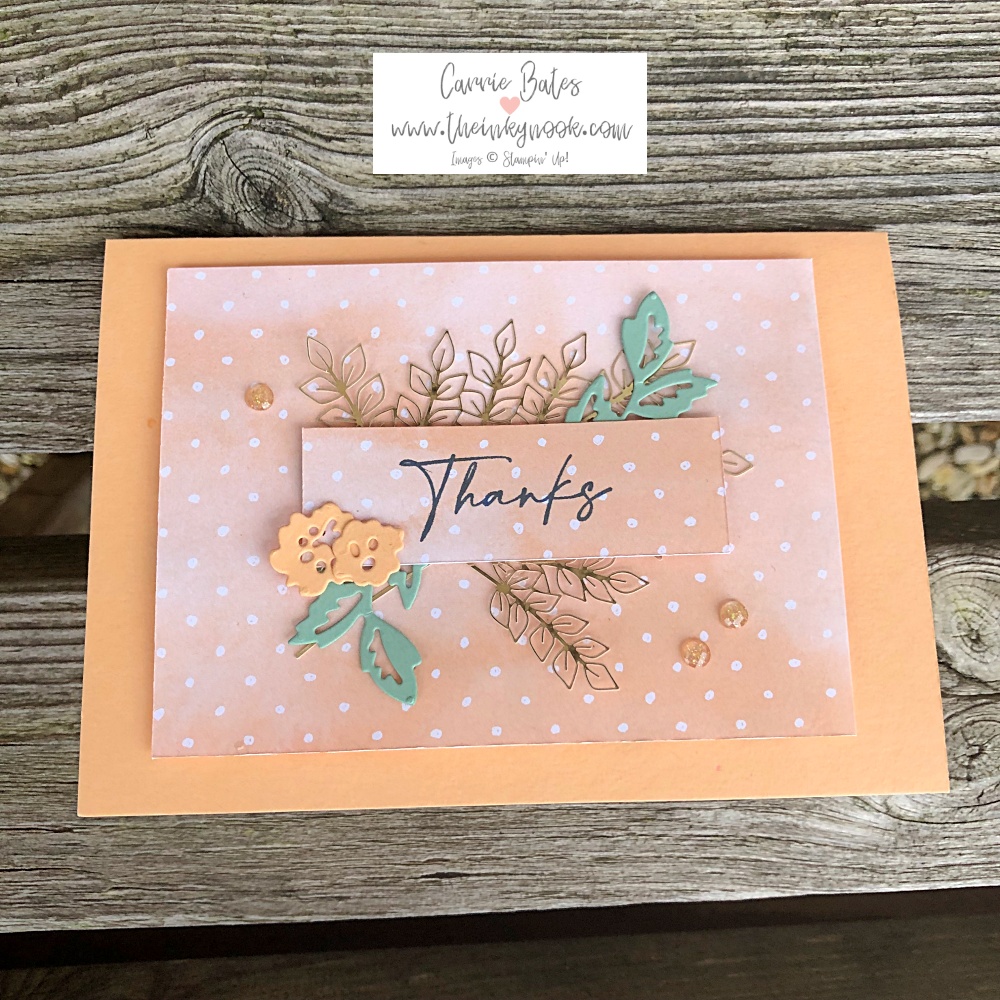
This card still uses the same size card bases but the designer series paper layer is downsized to 12cm by 9cm giving a wider border. Stamp a sentiment onto the same DSP or a different design but it needs to be simple in design so you can see the stamped greeting. Pop the sentiment label on with dimensionals but add some die cut details behind to frame the label. The finishing touch is some genial gems popped on and a tip is to always use an odd number.
I am going to share the final card in a blog post next week so be sure to pop back. Before I go though there is the most amazing joining offer at the minute. When you join my team, the TINkies, from now until the 30th November the starter kit is ONLY £75 and you get £130 worth of product. Normally it is £99 so still a bargain AND you get a minimum of 20% discount of any further orders and you can leave at any time. There is an amazing seasonal sale next week for 3 days starting on 15th November at 11pm until the 18th November so head over to my shop.
Until next time, inky hugs,
Carrie x
