I’m joining the tech 4 stampers blog hop this month and it’s been a while since I’ve hopped with them. Plus I’m happy to be back and I’ve got a gorgeous summer gate fold card to share with you. It’s using the Sips & Cheers designer series paper which is from the fabulous Celebratory Sips suite collection (until the end of June, whilst stocks last, as part of the buy one get one 50% off deal!). Believe me when I say this is a versatile suite for your cardmaking and creative projects. I’m thinking about sending some invites to my friends for a mini cocktail party night at my house in July using this suite. So shall we get started?
Summer gate fold card instructions
The ingredients you need for this card are 1 sheet of A4 coloured card, 1 sheet of A4 white card and then the Sips and Cheers designer series papers (DSP).
First cut your card base from the coloured cardstock, I’ve used Berry Burst for my card, measuring 7 3/4″ by 5 1/2″ scored at 2 1/2″ and 6 3/4″
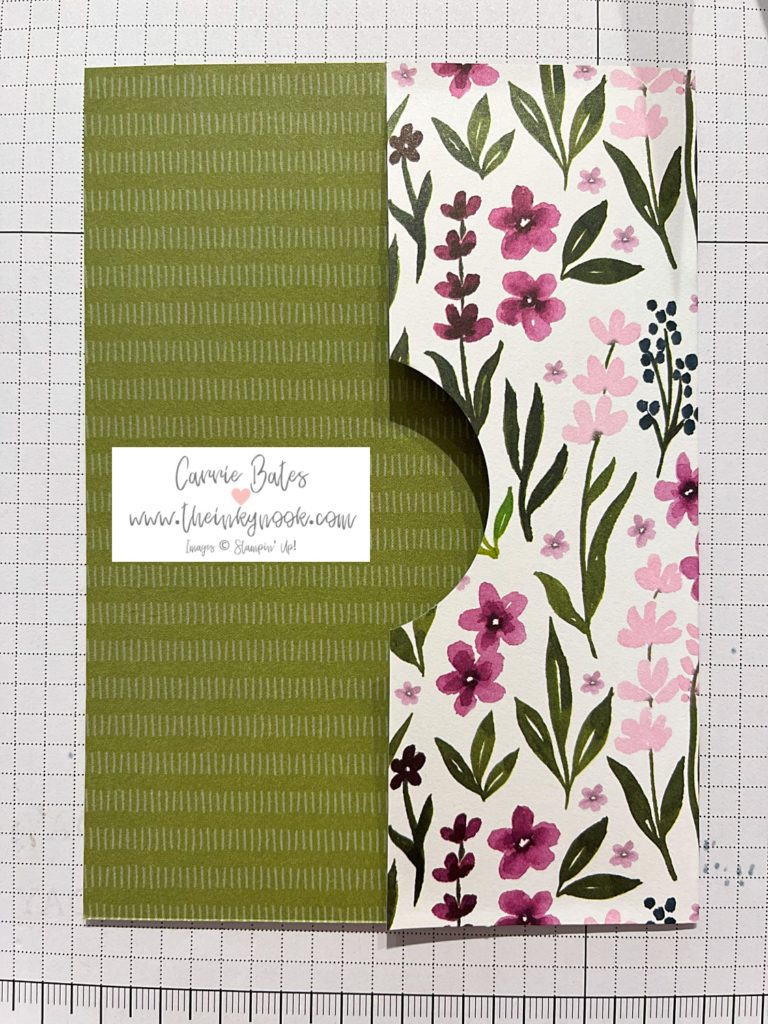
Then select the piece of DSP you want to use for the gift card holder flap and cut this to 5 1/2″ by 6″. Next on the 6″ side score a fold 2″ in from one end. This creates the foldover flap for the gift card to sit inside and I used a circle punch to create a little cut out too (see picture below)
Now glue the flap into place followed by gluing the opposite end of the DSP to the inside of the card base short fold. It will sit just to the right of the inside central panel. Next take a piece of white card measuring 4″ by 5 1/4″ and decorate using some of the Cheers and Sips stamp set. I’m so ready for a mocktail or cocktail or two over the summer months – what’s your favourite?
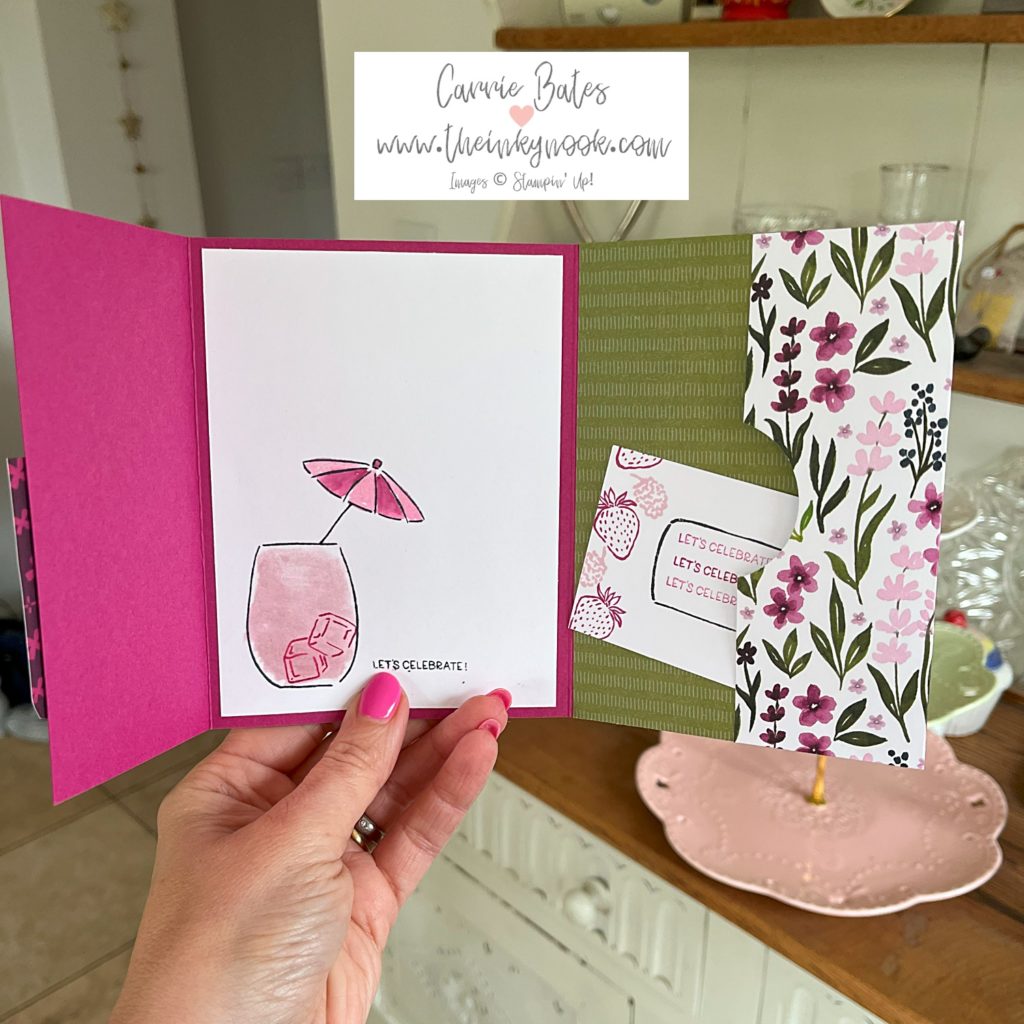
Glue this layer into the central panel of the card base. All that’s left to do is decorate the front of your summer gate fold card. I thought it would be fun to make my own gift card to insert inside. Then I’m going to pop a little note on the back saying one free drink on me for my friend !
Final steps
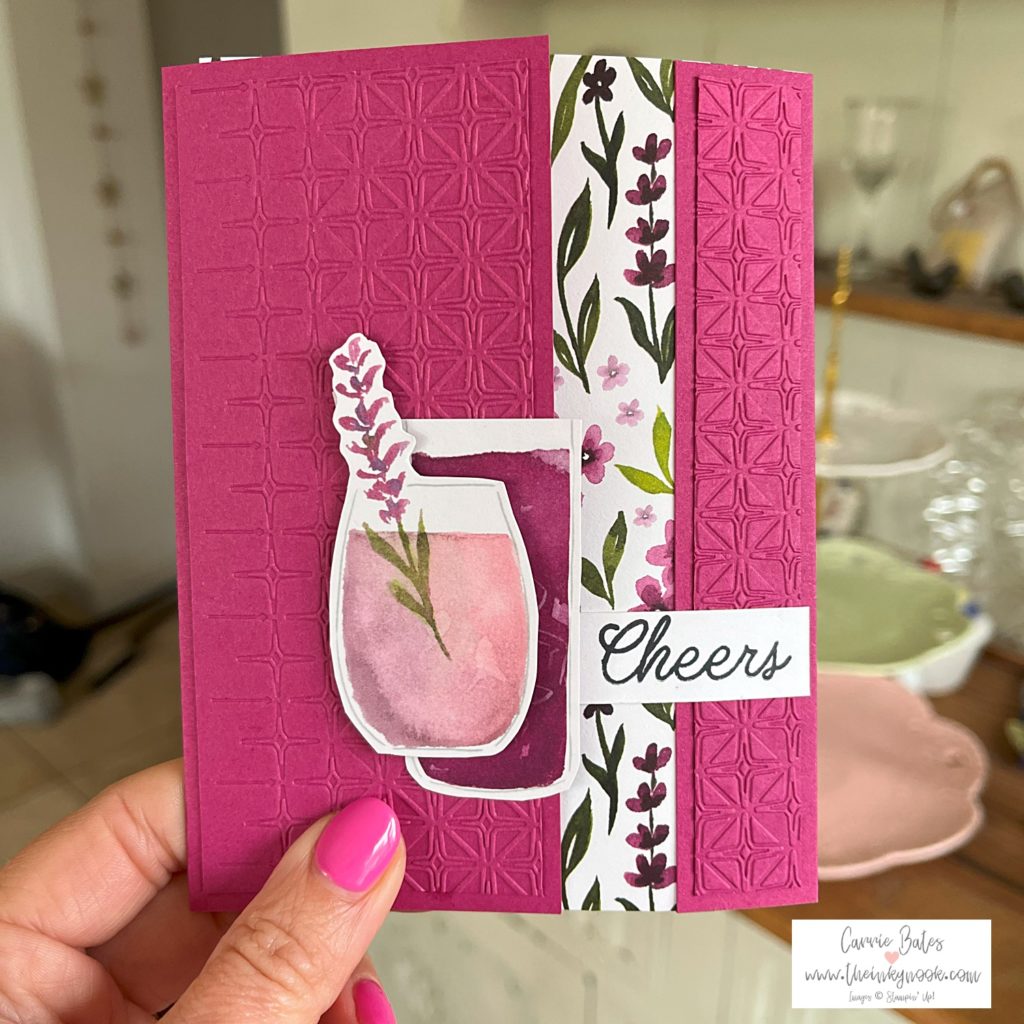
Taking the remaining piece of Berry Burst cardstock and cut two layers. One should measure 5 1/8″ by 2 1/4″ and the other should be 5 1/4″ by 3/4″. Emboss both pieces through your die cutting machine using the glass embossing folder from the suite collection. Now glue these to the front panels or you could use DSP if you prefer.
To finish off I fussy cut a couple of the pre printed drinks from the designer series paper sheets. Then fix them to the front left gate fold of the card base with dimensionals. Then I stamped the “cheers” greeting onto some white card and made a little banner and again used dimensionals to fix to the card.
I’m going to make a whole batch of these with different coloured card bases and this gate fold would look great with some of the other designer series papers Stampin’ Up! offer too. Let me know in the comments if you have a go at this gate fold card and tag me if you share your version online @theinkynook.
Enjoy seeing what the rest of the team have created to share today too using the blog list below. Until next time….
Inky hugs, Carrie x
Product List![Celebratory Sips Suite Collection (English) [ 165600 ]](https://assets1.tamsnetwork.com/images/EC042017NF/165600s.jpg "Celebratory Sips Suite Collection (English) [ 165600 ]")
![Paper Trimmer [ 152392 ]](https://assets1.tamsnetwork.com/images/EC042017NF/152392s.jpg "Paper Trimmer [ 152392 ]")
![Berry Burst A4 Cardstock [ 144249 ]](https://assets1.tamsnetwork.com/images/EC042017NF/144249s.jpg "Berry Burst A4 Cardstock [ 144249 ]")
![Basic White A4 Cardstock [ 166781 ]](https://assets1.tamsnetwork.com/images/EC042017NF/166781s.jpg "Basic White A4 Cardstock [ 166781 ]")
![Berry Burst Classic Stampin' Pad [ 147143 ]](https://assets1.tamsnetwork.com/images/EC042017NF/147143s.jpg "Berry Burst Classic Stampin' Pad [ 147143 ]")
![Rhinestone Basic Jewels [ 144220 ]](https://assets1.tamsnetwork.com/images/EC042017NF/144220s.jpg "Rhinestone Basic Jewels [ 144220 ]")
![Stampin' Dimensionals [ 104430 ]](https://assets1.tamsnetwork.com/images/EC042017NF/104430s.jpg "Stampin' Dimensionals [ 104430 ]")


Love your card Carrie! I have been playing with that stamp ser recently!
Thanks Diane – I hope you’ve been having as much fun with stamps as me 🙂