Hey there! Welcome to the Stamptastic Friends blog hop where our theme is Autumn this month. Now I don’t know about you but by this point in September I am all about getting my cosy clothes out, making my damson gin for Christmas presents and retreating to my craft room now the weather begins to chill off ! So I’m sharing an easy butterfly birthday card and using autumnal colours to fit our theme.
What do you need to make this butterfly birthday card?
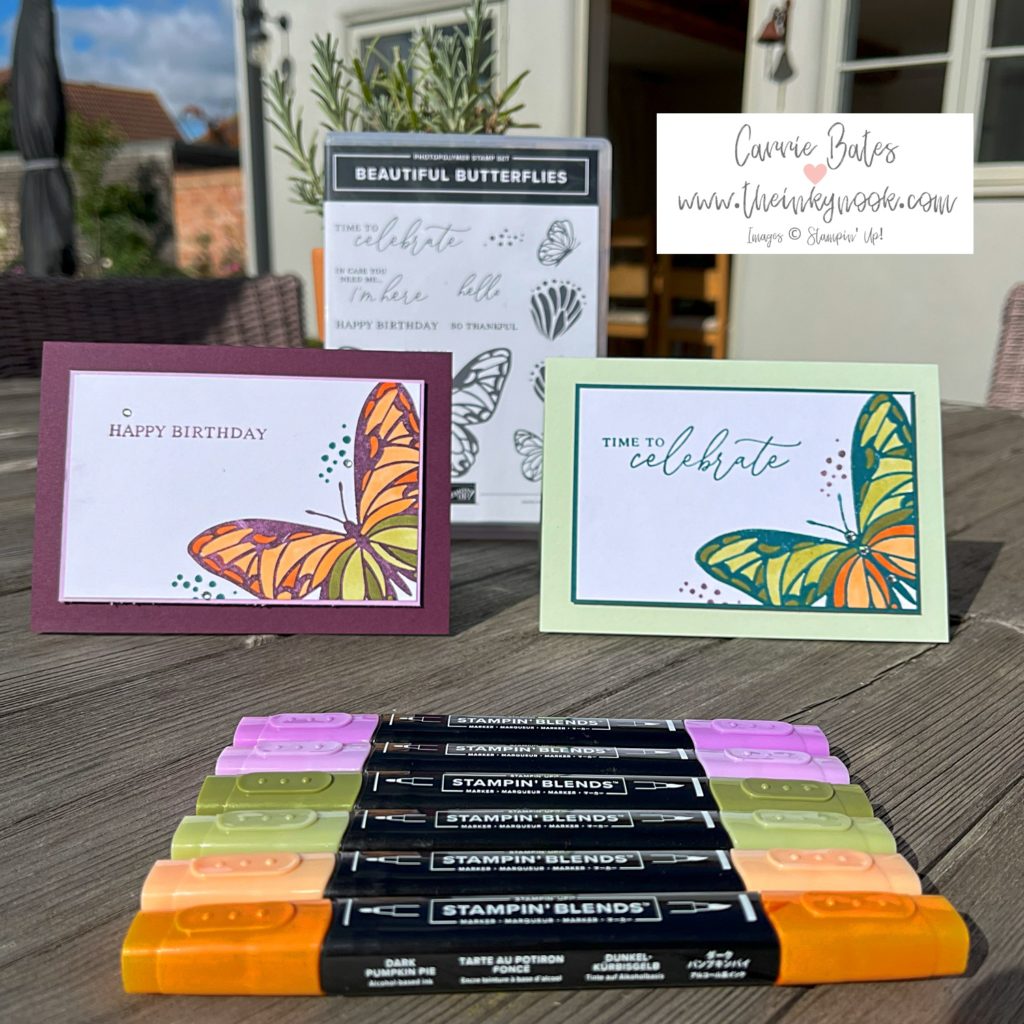
You are going to need a coloured card base measuring 14.9cm by 21cm scored on the shorter side at 10.5cm. My card bases are Blackeberry Bliss and Soft Sea Foam. You will also need a coloured frame for the front of the card measuring 12.7cm by 8cm which will sit behind your stamped layer. My top tip here would be to choose a lighter contrasting layer if your card base is a dark colour and then the opposite way round for a light card base. My Blackberry Bliss card is paired with a Fresh Freesia layer and the Soft Sea Foam card with Pretty Peacock.
Next you need 2 pieces of white cardstock, one measuring 12.4cm by 8cm and one measuring 13.9cm by 9.5cm. The smaller piece is for the front and the other for the inside.
Time to get stamping and colouring !
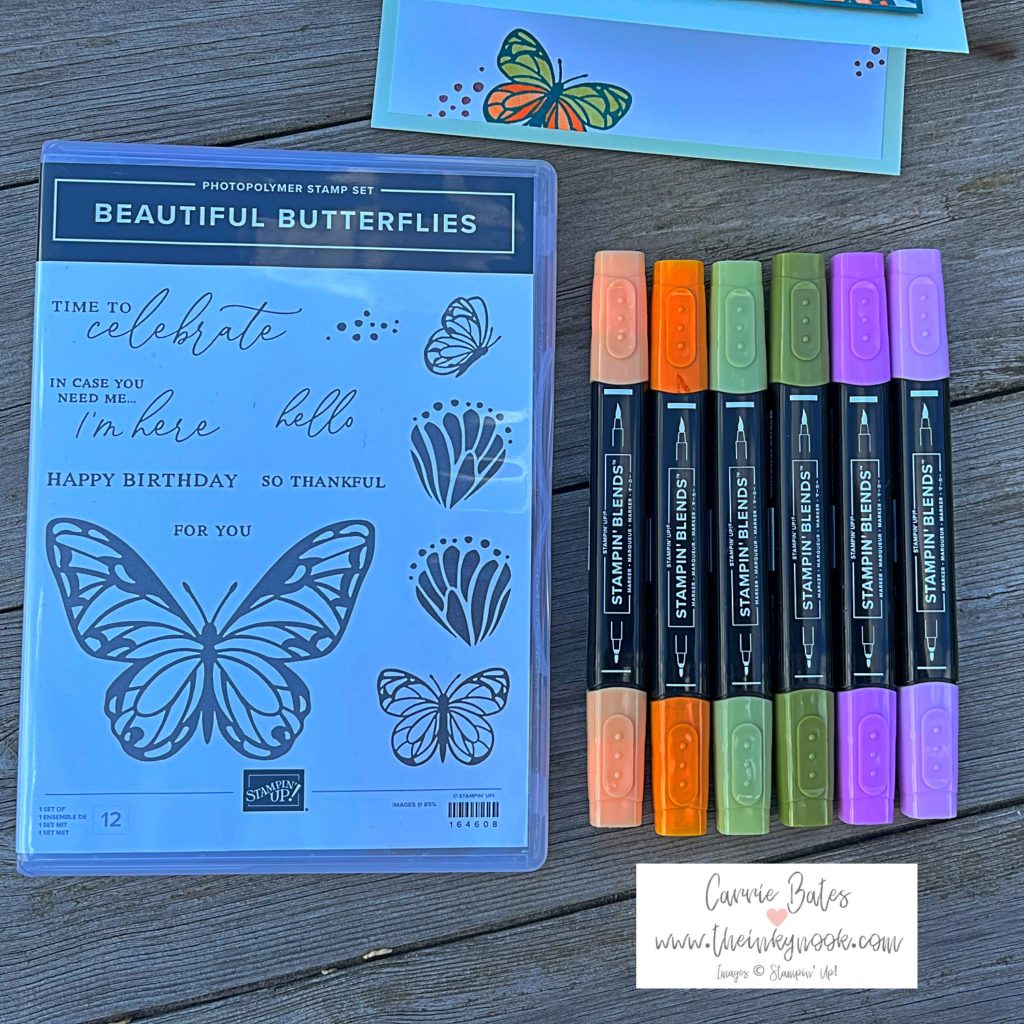
Starting with the front white card, stamp the large butterfly from the Beautiful Butterflies stamp set in Blackberry Bliss which is the same colour as my first card. The second card uses Pretty Peacock ink to coordinate with the card frame. Allow this to dry for a few minutes before you begin colouring. I would highly recommend the Stampin’ Blends which I am using as each colour comes with a light and dark pen. This really enables you to step up your colouring and add tone and definition to your images. You could colour the butterfly with just one colour but I opted for two colours, one for the top half and one for the bottom. My choices were Pumpkin Pie and Old Olive.
Make your inside card layer just as pretty as the front
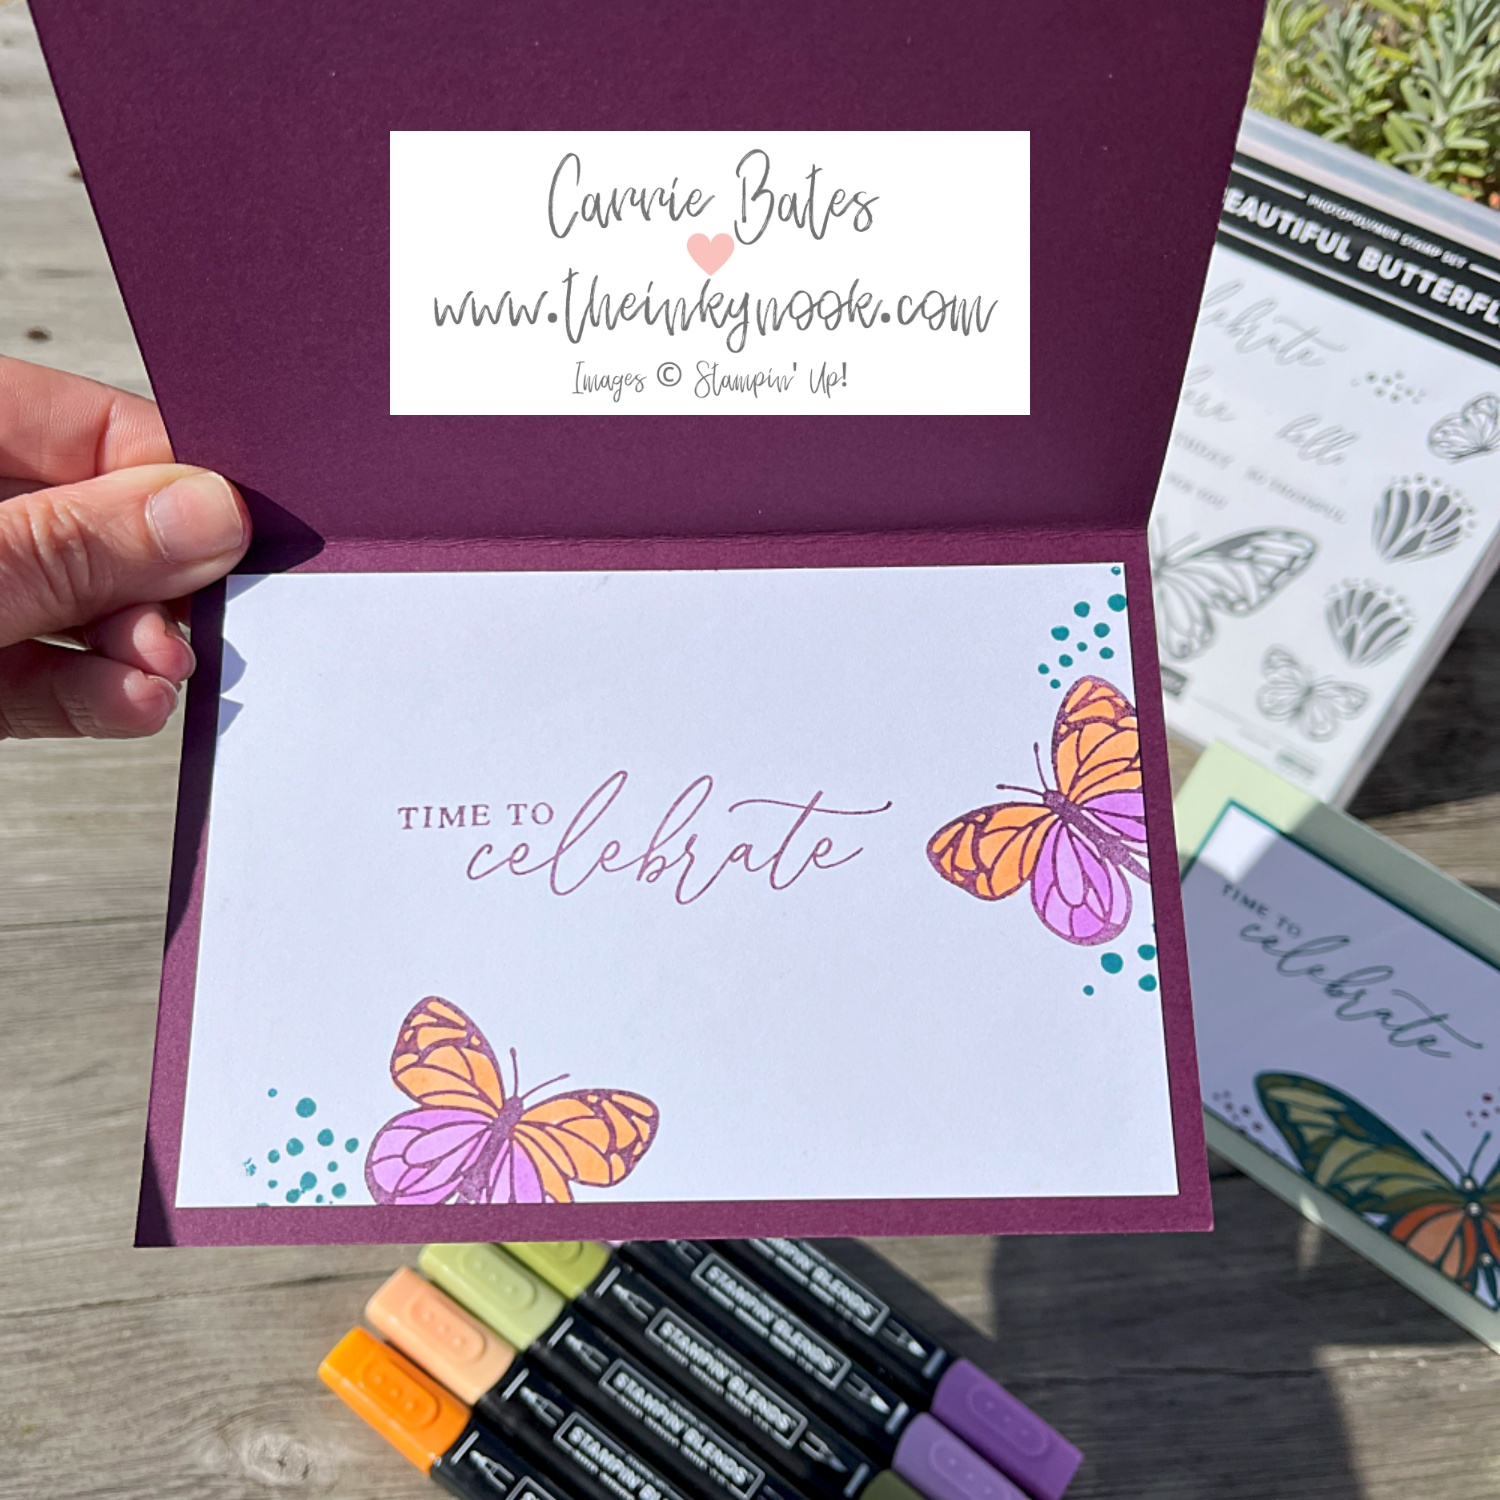
Stamp a couple of times with one of the smaller butterfly stamps on your inside layer and leave to dry. Whilst waiting for them to dry use another ink pad to add the “sprinkle of dots” stamp around the butterflies on both the front and inside layers. Now you can colour in the small butterflies.
Final steps
Glue the inside layer to the inside of your card. Glue your front layer to the coloured card frame and then use dimensionals (foam pads) on the coloured frame to secure it to the card base. To add a little bit of sparkle I added some crystal rhinestones in different places. On the Blackberry Bliss card I popped three randomly around the card and for the Soft Sea Foam I lined them up down the butterfly body.
I’d love to hear which one is your favourite so let me know in the comments below before you hop on around the rest of the list. Make sure to give us a follow on our social media platforms too as we share more cardmaking inspiration regularly there too.
Inky hugs, Carrie xx
Product List![Beautiful Butterflies Photopolymer Stamp Set (English) [ 164608 ]](https://assets1.tamsnetwork.com/images/EC042017NF/164608s.jpg "Beautiful Butterflies Photopolymer Stamp Set (English) [ 164608 ]")
![Blackberry Bliss A4 Cardstock [ 133682 ]](https://assets1.tamsnetwork.com/images/EC042017NF/133682s.jpg "Blackberry Bliss A4 Cardstock [ 133682 ]")
![Basic White A4 Cardstock [ 159228 ]](https://assets1.tamsnetwork.com/images/EC042017NF/159228s.jpg "Basic White A4 Cardstock [ 159228 ]")
![Fresh Freesia A4 Cardstock [ 155614 ]](https://assets1.tamsnetwork.com/images/EC042017NF/155614s.jpg "Fresh Freesia A4 Cardstock [ 155614 ]")
![Pumpkin Pie Stampin' Blends Combo Pack [ 154897 ]](https://assets1.tamsnetwork.com/images/EC042017NF/154897s.jpg "Pumpkin Pie Stampin' Blends Combo Pack [ 154897 ]")
![Old Olive Stampin' Blends Combo Pack [ 154892 ]](https://assets1.tamsnetwork.com/images/EC042017NF/154892s.jpg "Old Olive Stampin' Blends Combo Pack [ 154892 ]")
![Blackberry Bliss Classic Stampin' Pad [ 147092 ]](https://assets1.tamsnetwork.com/images/EC042017NF/147092s.jpg "Blackberry Bliss Classic Stampin' Pad [ 147092 ]")
![Rhinestone Basic Jewels [ 144220 ]](https://assets1.tamsnetwork.com/images/EC042017NF/144220s.jpg "Rhinestone Basic Jewels [ 144220 ]")