Hello and welcome to The Inky Nook where this week I’m sharing the butterfly cards I created in my weekly Facebook live session.
Each week on a Wednesday at 8pm I craft live on my Facebook page and you are more than welcome to join me if you don’t already follow me over there.
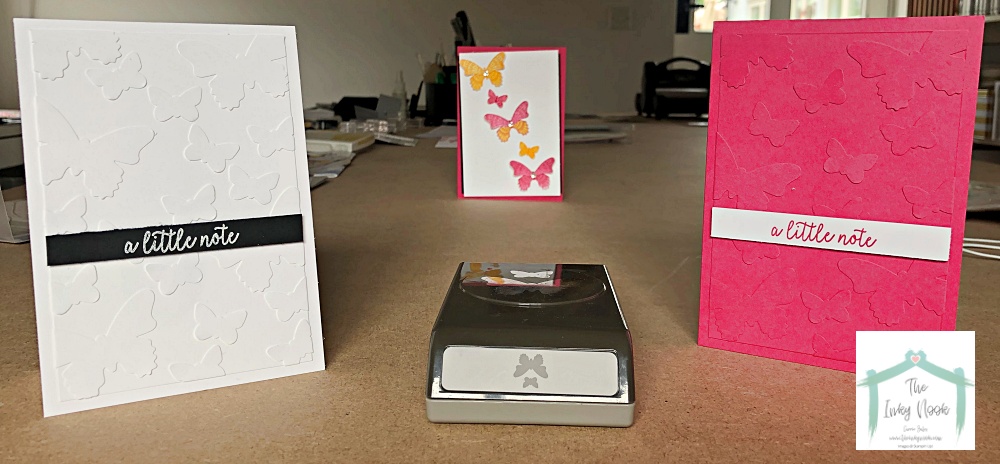
Butterfly card using just a punch
My first card uses the punch and cardstock alone. I took a whisper white card base and layer and some whisper white cardstock strips. Next I punched out about 5 butterflies out which gave me a small and large butterfly each time. These were randomly glued around the white layer with some overlapping the edge. Once dry I snipped off the overhanging edges to keep them flush with the card layer. This was glued onto the card base and added the sentiment strip with dimensionals.
After my Facebook Live I repeated the above using just Melon Mambo cardstock. Let me know in the comments which is your favourite version.
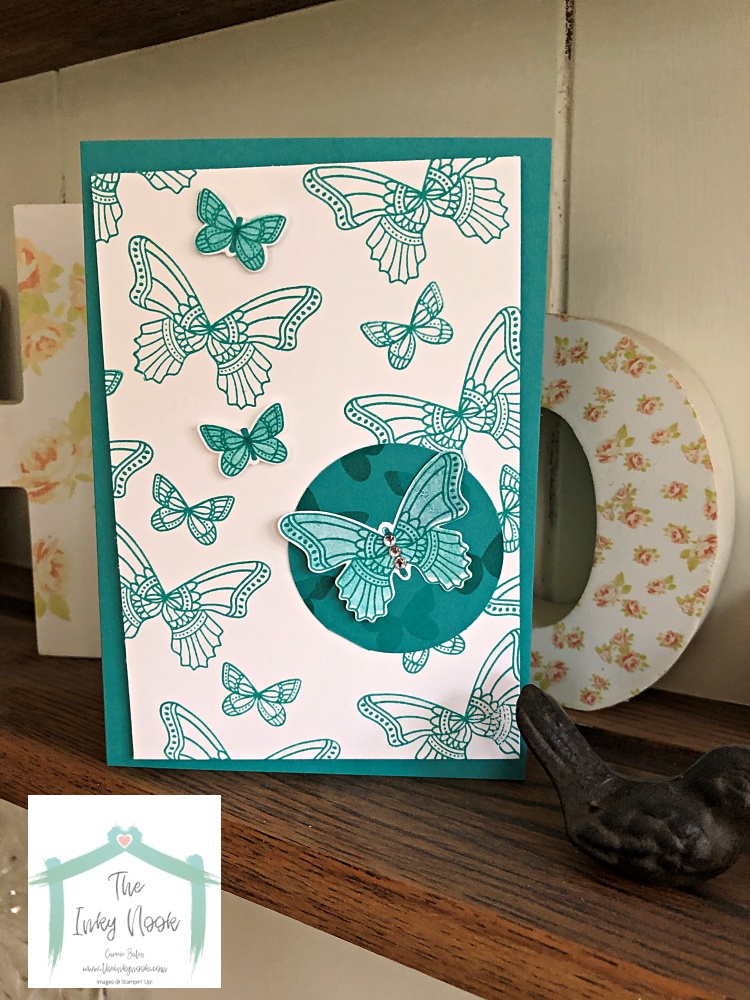
Bermuda Bay card
My second card uses just an Bermuda Bay ink pad and cardstock with the stamp set and punch. I randomly stamped one of the butterflies from the Butterfly Gala stamp set over a white card layer. I stamped 2 more onto a separate piece of white cardstock and punched them out. The smaller ones were fixed on with dimensionals and the larger butterfly glued to a Bermuda Bay circle. All that was left was to add some crystal rhinestones to the larger butterfly to complete the card.
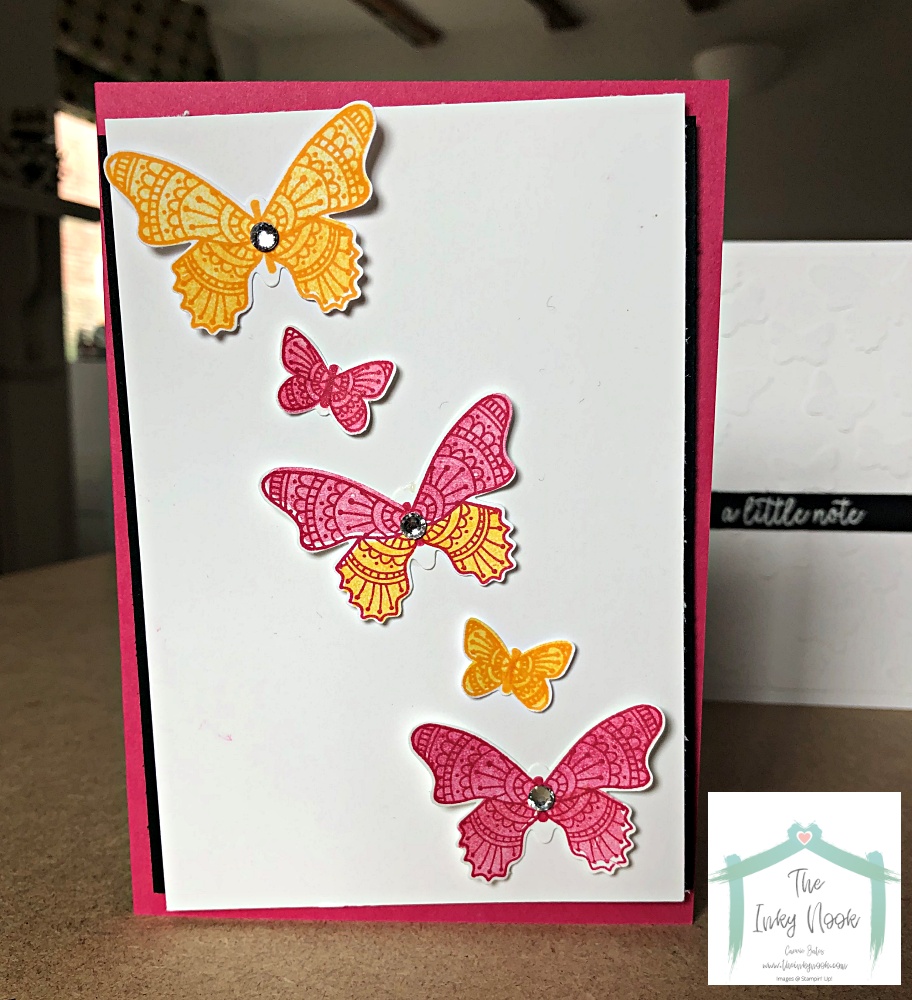
Two step stamping
For my final card, I showed my followers how to use the two step stamping and added in two colours. To re-create this stamp the butterfly outline in your chosen ink colour. Then take the wing infill stamps and add the background colour using the stamp off technique. This is where you ink up your stamp and stamp off onto a piece of scrap paper before stamping onto your project. The stamps are clear so you can see exactly where you are stamping.
I better finish this post off now as I’ve got my hubby’s invoices to sort out for the morning. Thank you for joining me today and let me know your favourite card in the comments below. If you’ve got a question then you can send me a message.
Until next time, inky hugs,
Carrie xx
PS I’ve included the main products I’ve used below. All you need to do is add your chosen coloured cardstock and ink pads.
Product List


Bermuda Bay has to be my fave if these ones – and it’s still on my mantelpiece!
Really like how you include the products you used at the end of the blog post.
Thanks so much Claire – I had decided that one of my projects from last weeks live was definitely headed your way. Bermuda Bay is one of my favourite colours now too. Including the product list at the end of the post just makes life a little easier for you to see what you need to have a go.
Inky hugs,
Carrie xx