For this week’s facebook live I wanted to share how you can make a double z-fold card. I have not created one of these before and it was fun to try something new. Now I’ve made one I will definitely be making more!
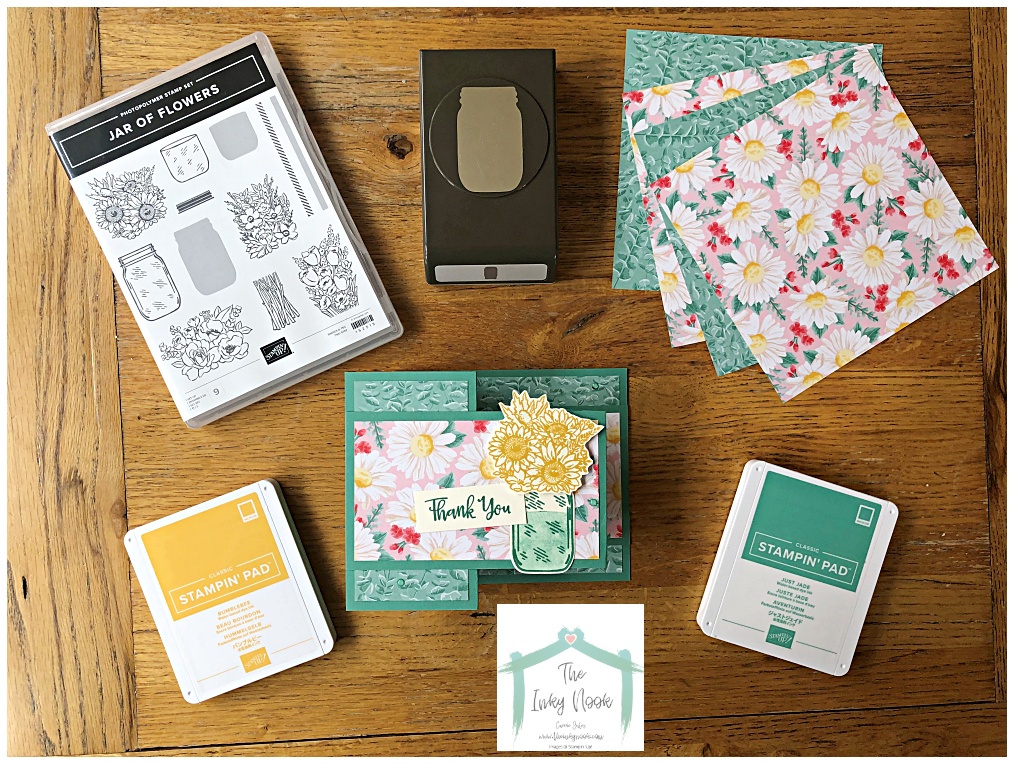
Flowers for every season suite
I love how this product suite showcases the beautiful 2020-22 In Colours. You can have as much or as little as you want from the suite. I started with the Jar of Flowers stamps and punch followed by the designer series paper (DSP) and the ribbons and gems. My next addition might have to be the Celebrate Sunflowers Bundle – don’t tell hubby !
Anyway I an getting distracted talking about my long wish list of Stampin’ Up! goodies I want to buy so back to the double z fold card.
How do I make a double z fold card?
You need to first select a sheet of A4 cardstock and you will create the card base and folding layer from this. Cut your A4 cardstock as per the measurements in the diagram below. Next you will need to score both pieces at 7cm (2.75 inches) and 14cm (5.5 inches). I wanted to have DSP on each of my panels and I simply took 1cm off each section’s measurements. To help you, I have included the measurements below for each section. You could use any DSP you like or even add another colour cardstock.
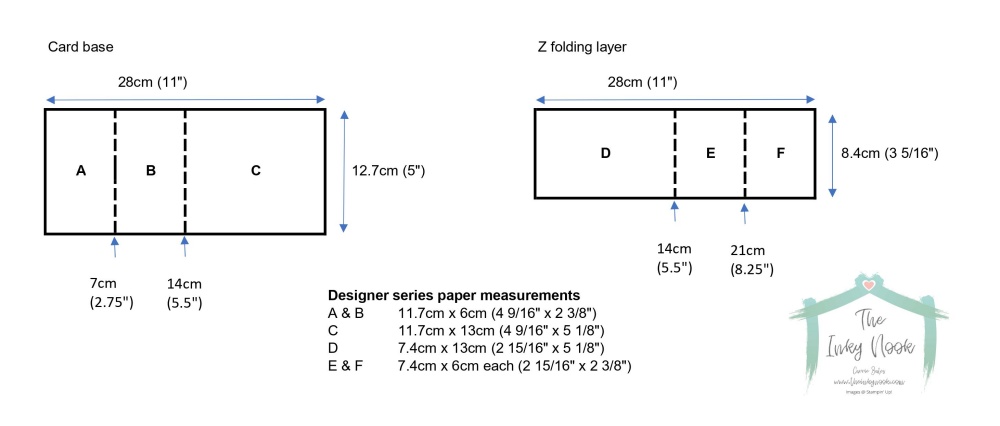
Next steps – assembling the double Z fold card
I would recommend using something like double sided tape or Stampin’ Seal for sticking the base and layer together. Use your chosen adhesive on the reverse of the section labelled “F” and stick this to section “C”. I have lined mine up on the middle of the base but you could offset it higher or lower. You might wish to do this if you have made your Z folding layer narrower than the 8.4cm measurement I used. The below image shows you a closer image of how this will look.
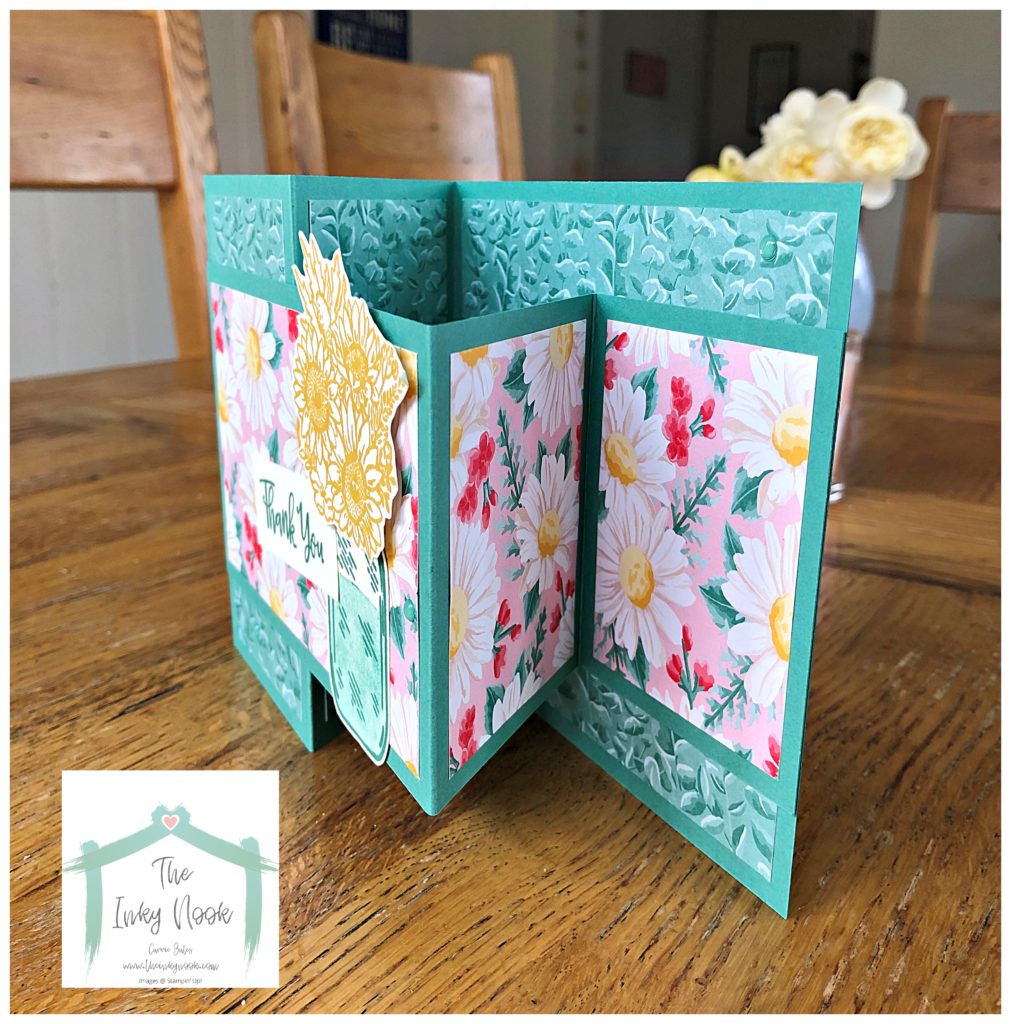
Follow this up by putting adhesive on the back of section “D” to stick to section “A” and just remember that section “A” is half the size of section “D” so do not use adhesive all over section “D”. Now enjoy opening and closing your double Z fold card whilst you think about your finishing touches.
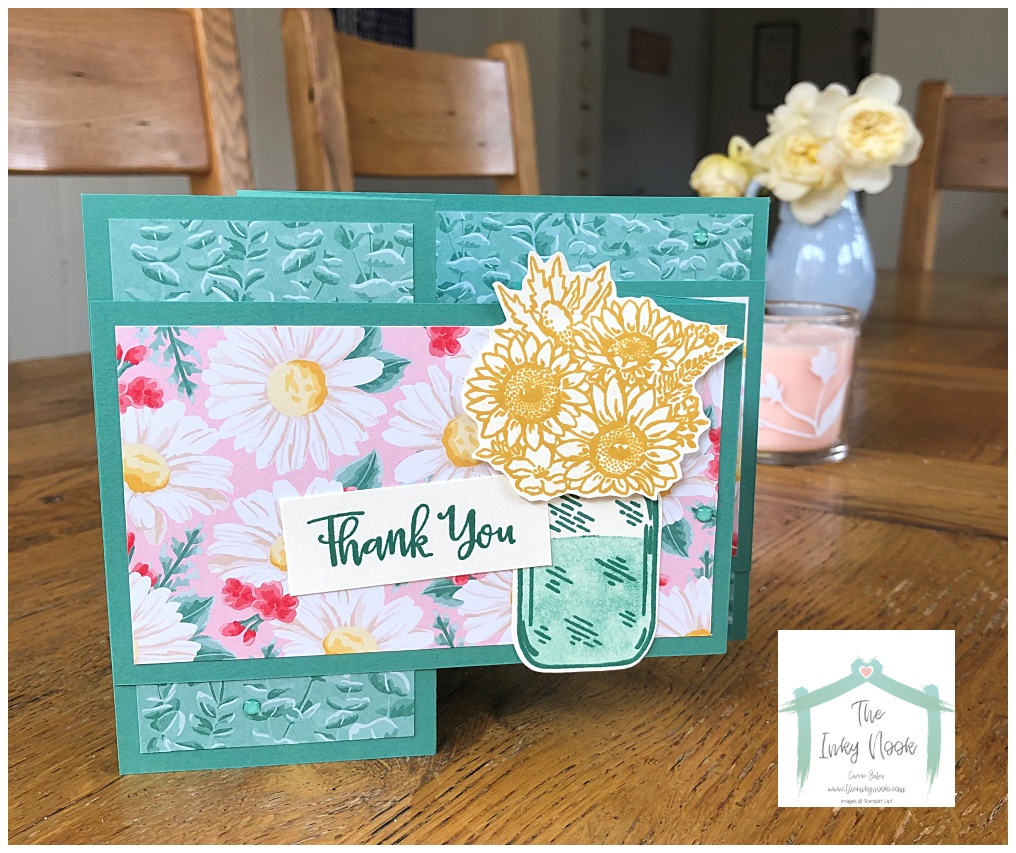
Finishing touches for your double Z fold card
I stamped a jar and used the punch to cut it out and added one of the floral bouquet stamp images which just had to have a little wink of stella brushed over it. We all love a little shimmer and sparkle on our cards don’t we?
I added “Thank You” as a sentiment although you could easily swap this for “Happy Birthday” or “Hello”. It is such a versatile card template.
If you would like a PDF with the card template emailing over you can contact me here Make sure you tag me on facebook or instagram when you share your makes. I will be back next week with the Stamptastic Friends design team so until then….
Inky hugs,
Carrie xx
PS You can view the original facebook live video tutorial here
Product List
 Designer Series Paper")


