Hi there and welcome to The Inky Nook with me, Carrie. I’ve been a Stampin’ Up! demonstrator for about 6.5 years now and I can’t believe I have not used this technique before now. This week’s blog post is going to explain how to do the reverse stamp technique.
Reverse stamp – first steps
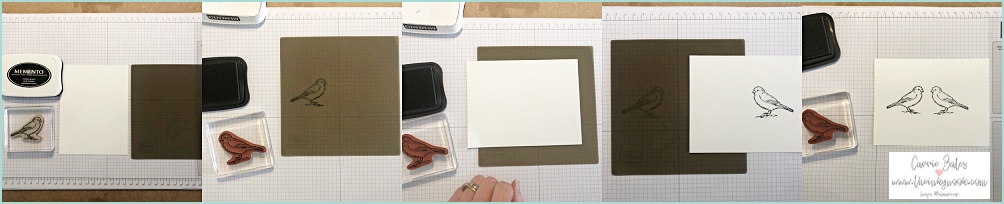
Firstly you will need an ink pad, silicone craft sheet, cardstock and your chosen stamp. Your cardstock should be the size of your card layer unless you are going to be cutting the image out. I opted for Memento black ink as I wanted to colour with the Stampin’ Blends. Secondly, ink up your stamp and then stamp on to the silicone craft sheet. Thirdly place your card layer on top of the inked image and firmly rub over being careful not to slide the card around. You may want to make some pencil marks on the back of the card if you are unsure of placing it accurately down. Image 4 shows how the image should appear when you lift the card layer over.
The silicone sheet should be washed off with some warm soapy water. Finally I am stamping the the bird facing the way it is designed to face by stamping straight down onto the card layer. It looks like they are having a little conversation.
Colouring with Stampin’ Blends
I love to colour with Stampin’ Blends when using the Free as a Bird stamp set. You can create some many different bird types. A top tip is to colour with the darker Blend first then use the lighter Blend to graduate the colouring. You can see in the picture below I have started with Crumb Cake blends for the head, wing and tail.
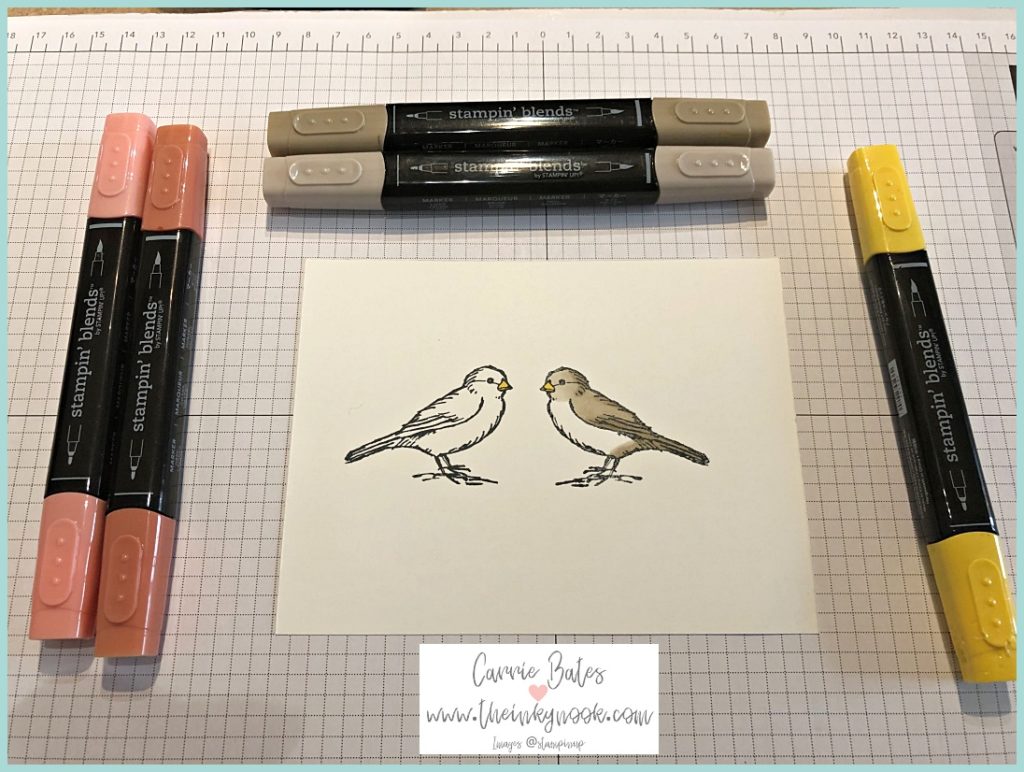
The tail and lower wing are both in the darker Stampin Blend along with the back of the head down it’s body. Next I am using Calypso Coral Blends for the chest area and Daffodil Delight for the beak. This is followed by adding some leaves and flowers which are going to be coloured in Old Olive, Calypso Coral and Daffodil Delight. Are you ready to see it?
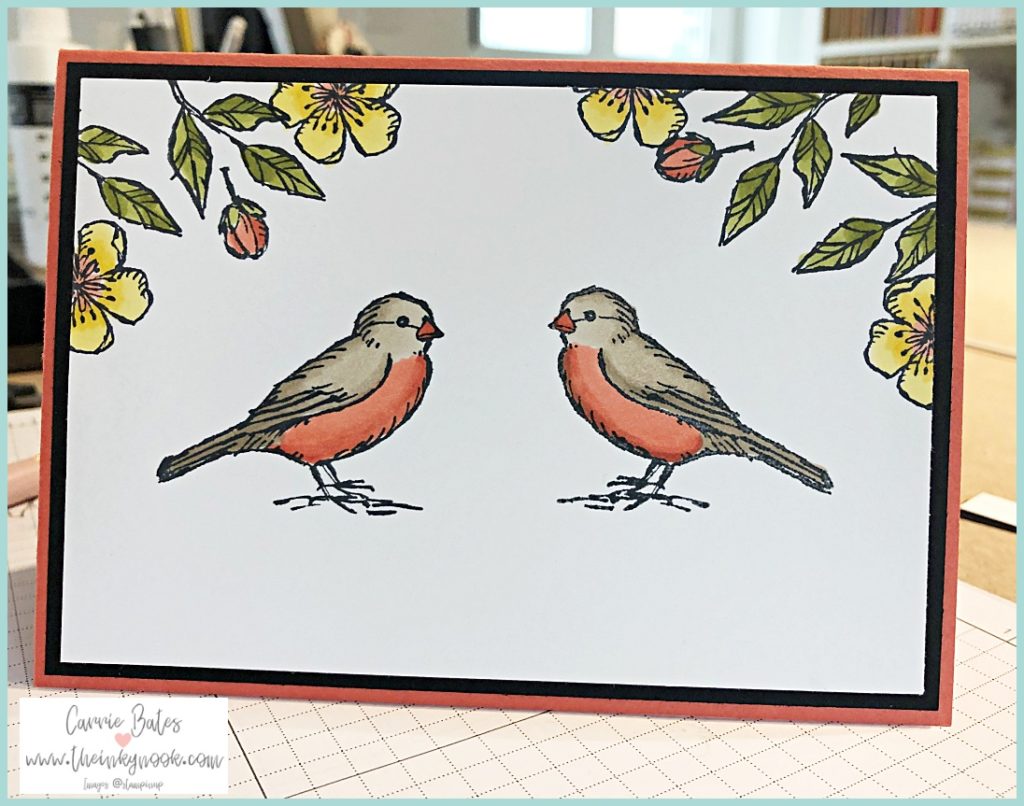
Finally I took a Calypso Coral card base, a black mount and then added the reverse stamped card layer on top of that. I think the black mount just makes the colours in the images pop out from the card even more.
Thank you for joining me today and comment below if you will now be trying out the reverse stamp technique. Tag me on social media if you share your creations. At the end of today’s post is a list of the products I’ve used if you want to purchase any. If you’d like to see my other blog posts with Free as a Bird click the link. I will be back on Tuesday with another designer series blog hop with the Tantalizing Stampers.
Enjoy your weekend,