I am always excited at the upcoming release of new Stampin’ Up! catalogues as it means as a demonstrator I can pre order those products before they go on general sale. So today this means me and my Stamptastic Friends can share some of our pre order favourites with you. I have a Pretty Perennials happy birthday card using the Pretty Perennials stamp set and co-ordinating dies.
Pretty Perennials birthday card for a beginner crafter
The stamp set is ideal for any new crafters to get started as it has some great sentiments and an assortment of flowers. A great beginners card used just stamps, ink and paper. My first card uses just 2 colours, Gorgeous Grape and Soft Sea Foam and the stamp set.
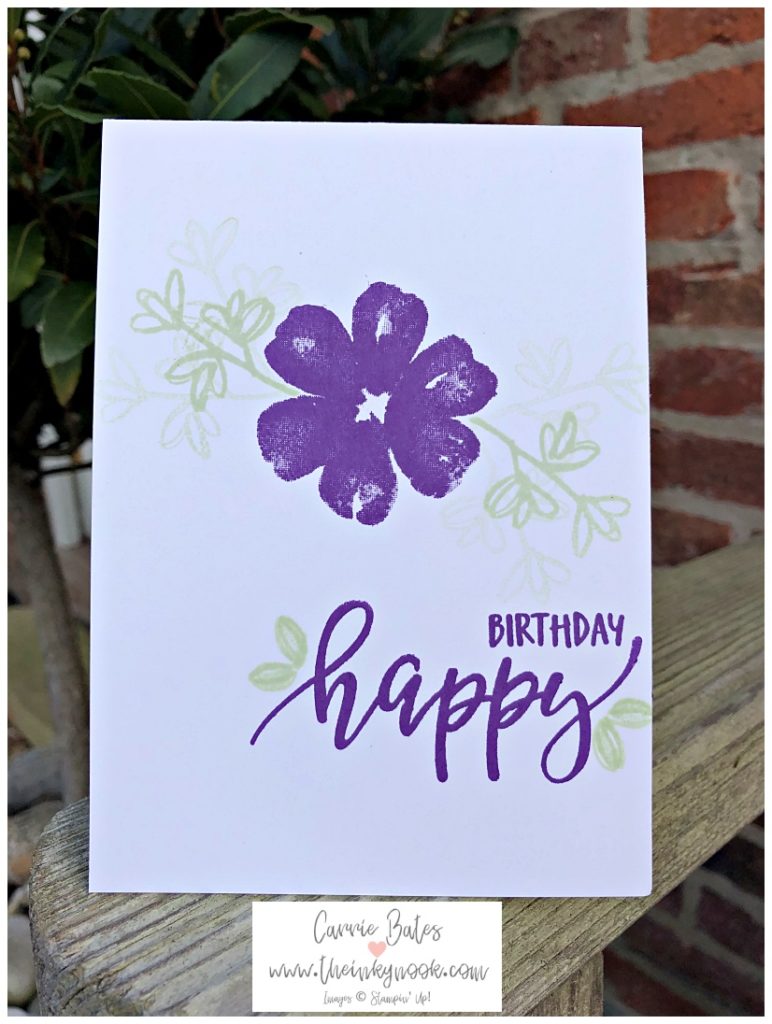
Begin by stamping the big flower followed by the branches which I inked up once and then stamped three times. Next I would suggest you stamp the “happy” followed by the “birthday” before adding in a couple of leaves either side.
Another handmade Pretty Perennials birthday card for a more experienced papercrafter
For the second card I want to share with you today I want to show you how you can create a card with a little more “wow” for an extra special card. I cut a Soft Sea Form card base and layer and embossed the layer using the new Painted Texture 3D embossing folder. Next I flicked some Wink of Stella drops over the embossed layer and left it to dry off.
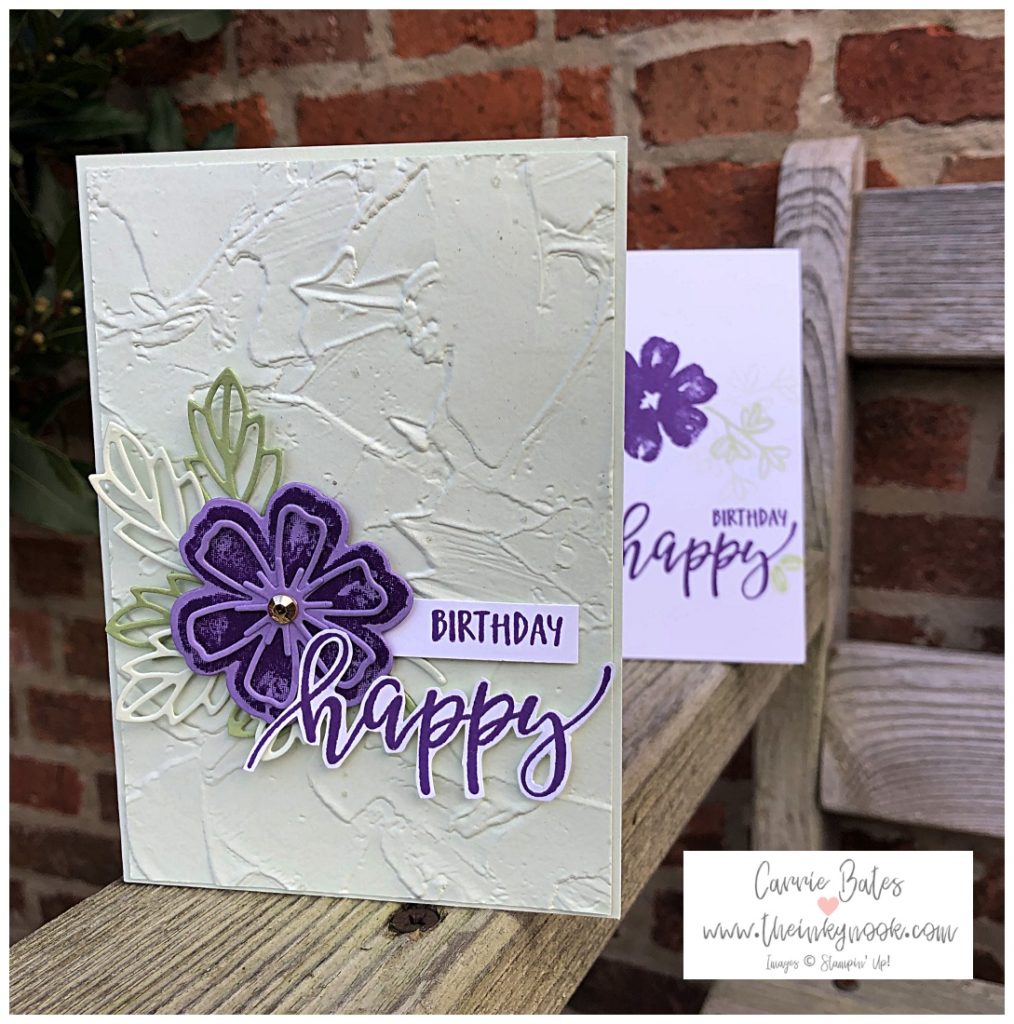
I die cut some branches from Soft Sea Foam and Pear Pizzazz cardstock and a flower from Gorgeous Grape. This is layered on the left hand side and topped it with a Gilded Gem in the centre. I stamped the “‘happy” and “birthday” on to whisper white card stock. Finally I fussy cut the “happy” sentiment and fixed it to the card with mini stampin’ dimensionals.
Do you love this stamp set and the dies as much as me? Once the catalogue goes live I will pop back and share the catalogue links with you. Use the list below to jump around the blog hop and see what the other Stamptastic ladies have to share today and I shall be back again soon. Wishing you all a safe and merry Christmas !
PS Catch up on previous Stamptastic Friends blog hops
Product List


Great job with the fussy cutting! I think I could find one in my stash so I don’t need to fussy cut. I’m not that good.. I like the embossing folder so much I need to get that so bad! Love your card.
Hi Laurie – thanks for the lovely comment I’m glad you like the card. I don’t like to fussy cut all the time but I really did enjoy it for this card. Make sure you tag me if you share you share on social media so I can see what you have created.
Inky huga,
Carrie x