Welcome to the Totally Techniques blog hop! I’m Carrie from The Inky Nook based in the UK and I’m a guest designer joining in this month. Each month the team chooses a technique to feature and each of the artists showcases their version of the technique. This is a great way to see different interpretations and projects from around the globe. This month’s technique features how to use sponge brayering for cardmaking.
What’s a sponge brayer?
It’s basically a sponge cylinder with a handle to roll it backwards and forwards.
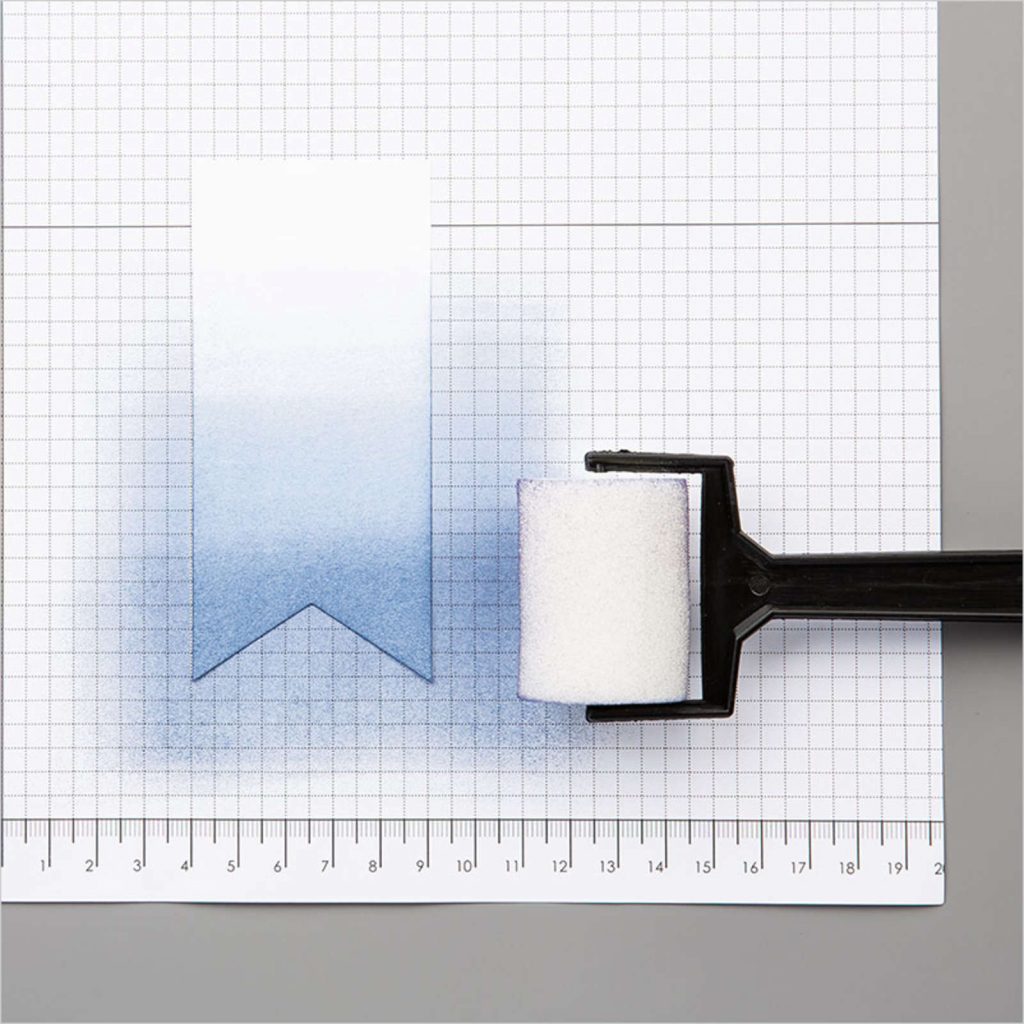
You will ink it up using your ink pad and then roll it onto cardstock. You can use it to create background layers, change the colour of white cardstock if you don’t have that colour to hand, punch shapes to create embellishments for you cards. Ok shall we get started?
Sponge brayering for cardmaking – how to
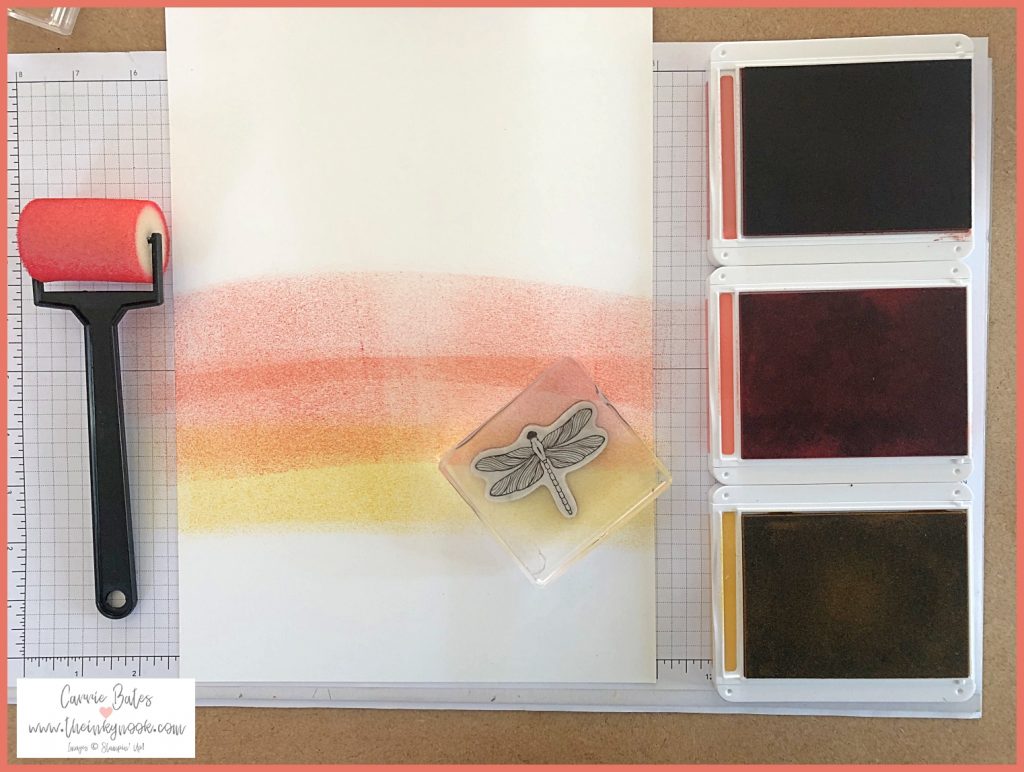
Pick 1 colour or more to use with the sponge brayer for my first card I chose Bumblebee, Calypso Coral and Terracotta Tile. Begin by rolling your sponge brayer forward and backwards across your ink pad and then apply to your cardstock. Repeat this with the same colour as many times as you like or switch to your next colour and repeat the same process. I think it looks particularly effective if you layer up several colours. In addition, build the brayering up slowly by only taking small amounts of ink onto the sponge brayer.
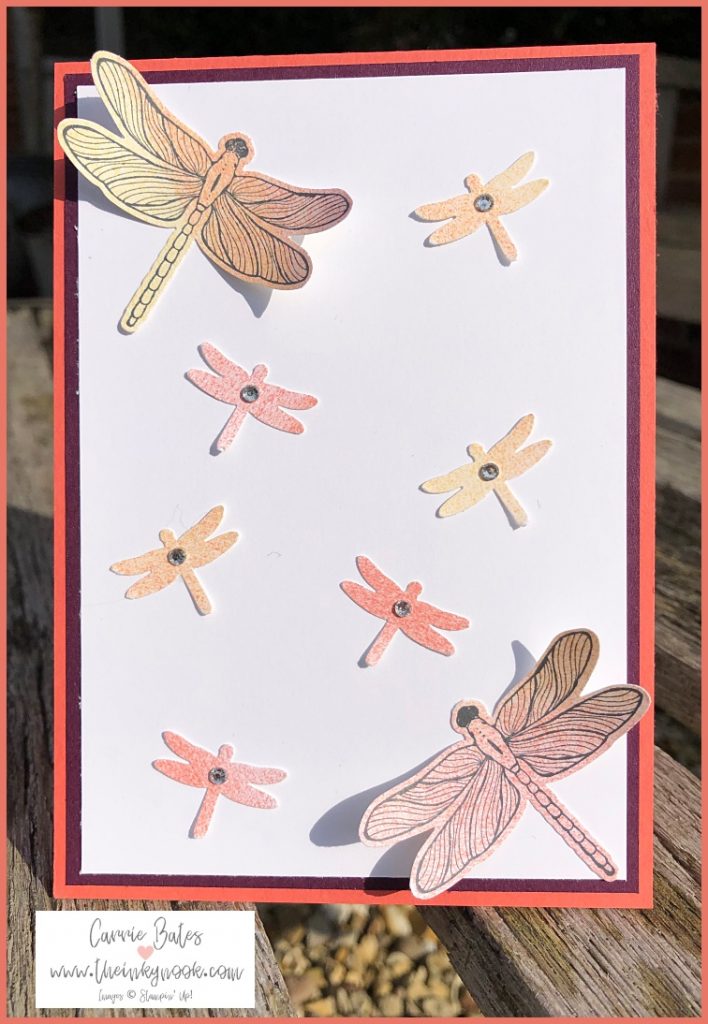
Dragonfly simple stamping card
For this first card I’m sharing with you, I have cut a card layer from the above brayered cardstock and stamped the dragonfly over it.

Sponger brayering card
This second card used the brayered cardstock left over from the sheet I first created above. The large dragonfly was stamped in Memento ink and punched out using the Dragonfly punch. This then gave me the idea to continue using the punch to cut out mini butterflies from the remaining cardstock. I arranged the large butterflies in each corner and curled their wings with a bone folder before gluing to the card. Then I scattered the mini butterflies over and topped them with a crystal rhinestone just for a little sparkle
So let me know in the comments which is your favourite card I’ve shared today and enjoy hopping around the rest of the blog hop using the links below. Thanks for joining me today and enjoy having a go at sponge brayering in your cardmaking.
")


Lovely way to use the brayer Carrie . Great colours and design . So pleased you could join us this month. Thank you Zoë x
Thanks Zoe – I love a technique challenge so thank you for having me xx