
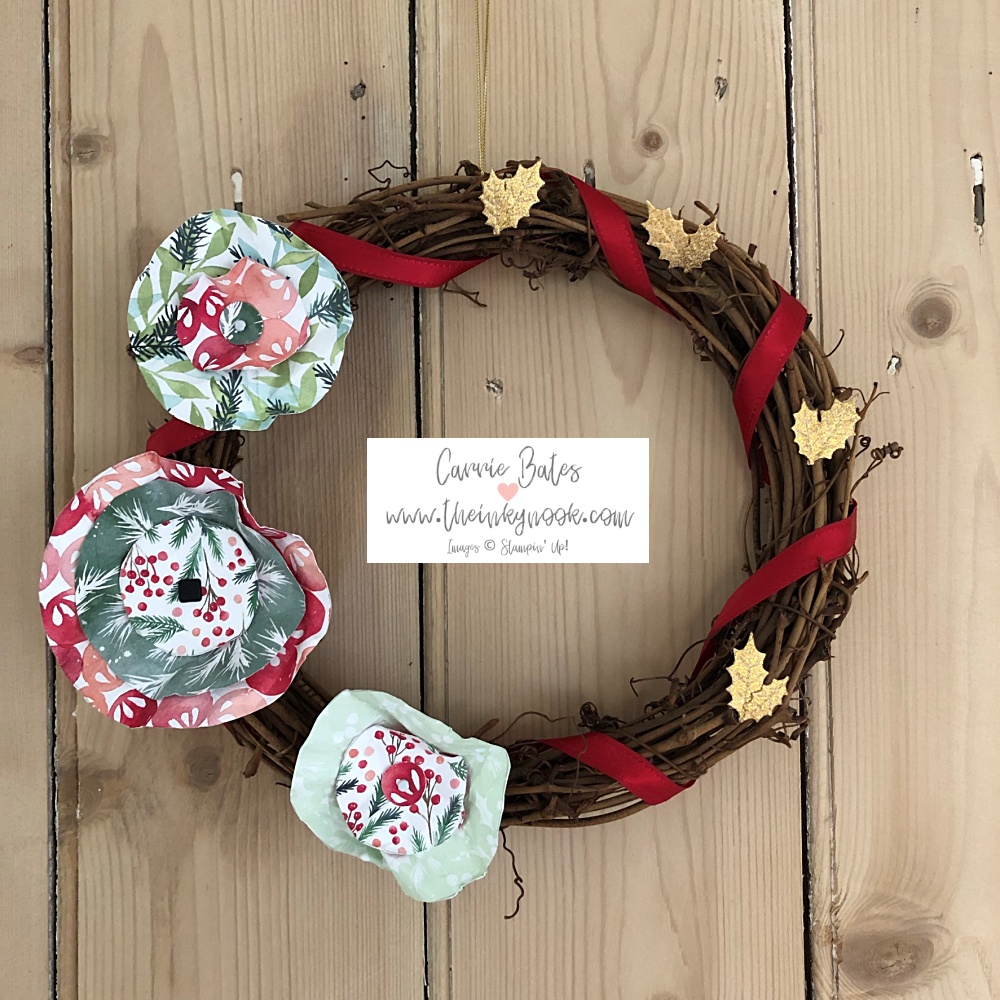
Welcome to the Tech 4 Stampers monthly blog hop where the theme is ‘anything but a card’. I am sharing a Christmas wreath gift idea using a grapevine wreath and designer series paper. One of the artisan team shared a Halloween grapevine wreath recently and I wanted to create my own version. Let me share how I made it so you can have a go too !
Step 1 – pick your Christmas wreath gift base
I sourced my grapevine wreaths from Amazon and they are 20cm in diameter which makes them perfect for hanging within the home.
Step 2 – pick some Christmas themed designer series paper (DSP)
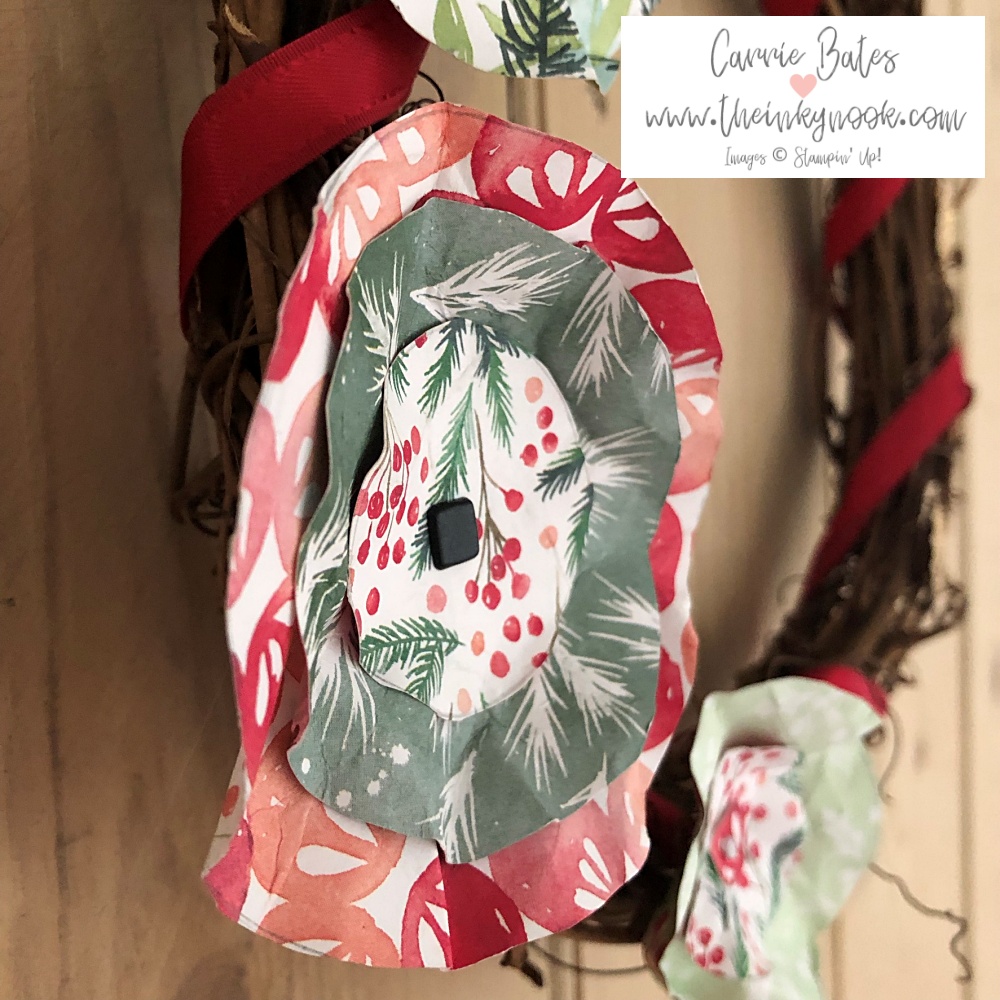
My choice for the Christmas wreath gift is the Painted Christmas DSP from the Autumn/Winter mini catalogue. The DSP is used to make our ‘flowers’ for the wreath and each flower has 3 (circular) layers. For the larger flower you need a large circle, middle circle and a small circle which I used a ribbon reel, embellishment holder and tealight as templates. For the smaller flowers: the large flower middle circle becomes your large layer, the large flower small circle becomes your middle layer and my small circle uses the now retired 1/2″ circle punch. Alternatively you can just roughly cut them out without using a template. I liked that I could use circular objects easily found in my craft room though.
My recommendation is one large flower and two smaller flowers either side. To assemble I layered the 3 circles on top of one another and then pierced a small hole with my scissors before securing with a small brad. The round and square brads are a mixture of black and white so they will coordinate with almost any designer series paper colours. Their addition just finishes off the flower centre for me. Finish assembling your flowers and then move onto the next step.
Step 3 – wrap your ribbon around your Christmas wreath gift
Choose a ribbon to wrap around the frame, mine is the 3/8″ real red stitched ribbon as it looks beautiful with the Painted Christmas DSP. Secure one end of the ribbon using a hot glue gun and wrap around the wreath until you get back to the start. Using the glue gun again secure the end to the wreath and for a professional finish try and wrap it over the other end of the ribbon.
Step 4 – position your ‘flowers’
Pop your flowers onto the wreath and once you are happy with their positions simply use the glue gun to secure them in place. I think at this stage you could stop but I’ve got one more little finishing touch for you….
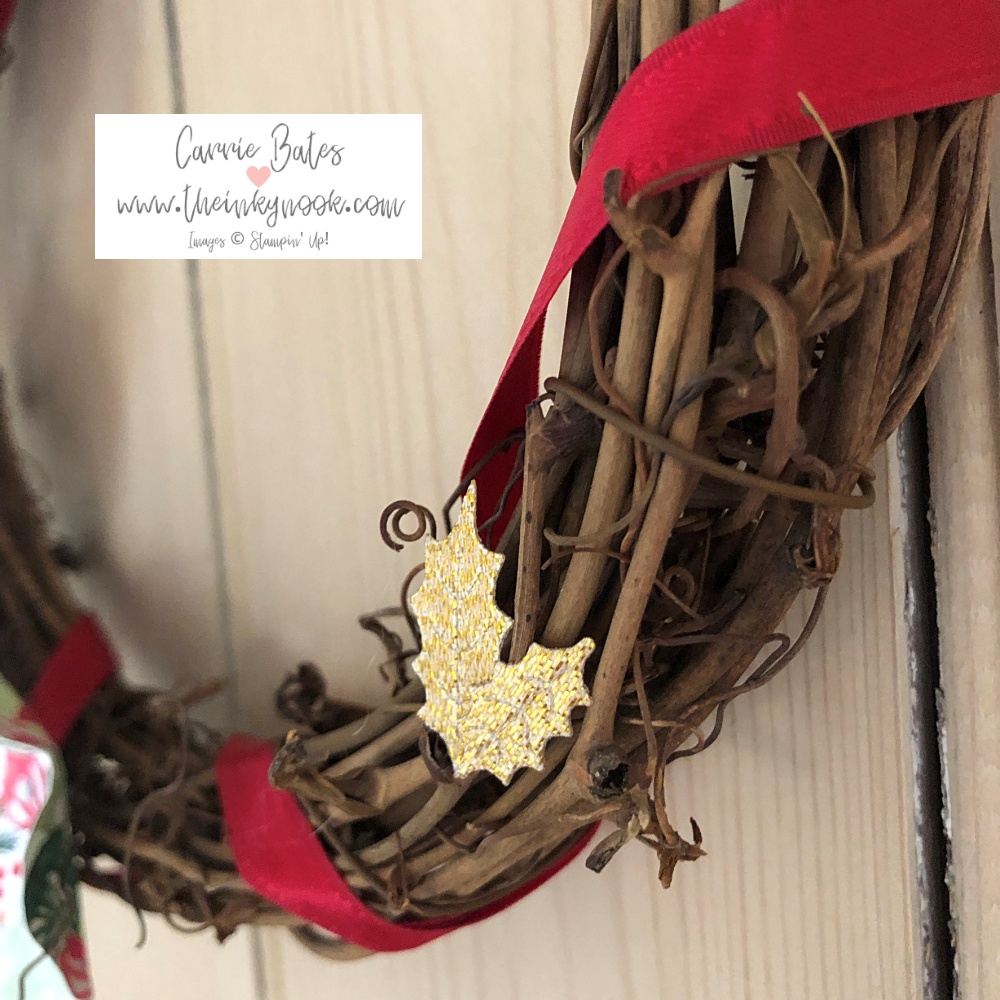
Step5 – gold holly leaves to finish off
These leaves are a glittery gold so pair up a small and large leaf and gluing between the ribbon gaps is the finishing touch. Would you agree?
To hang the wreath I used the simply elegant trim in gold and looped it through the top of the wreath securing with a knot.
I’d love to hear if you like the Christmas wreath gift idea above. If you want to keep up to date with my blog posts and news use the links below to sign up. Please use the blog list to see what the other ladies have designed to share today.

 Designer Series Paper")

 Double-Stitched Satin Ribbon")


What a wonderful wreath – Love it!
Thanks Sara – not sure where your comments has been hiding 🙂
What a fabulous home decor piece! Tfs Carrie, love it!
Thanks so much Elaine – hope it inspires you to have a go xx