
Welcome to the Tech 4 Stampers hop and hello whether you are joining from Gina’s blog or starting with me. This month’s theme is “pretty in pink” and I adore the many pinks within the Stampin’ Up ! colour collection. I will show you how to make your own masks from die cuts to use in your cardmaking. Shall we get started?
How to create your own masks
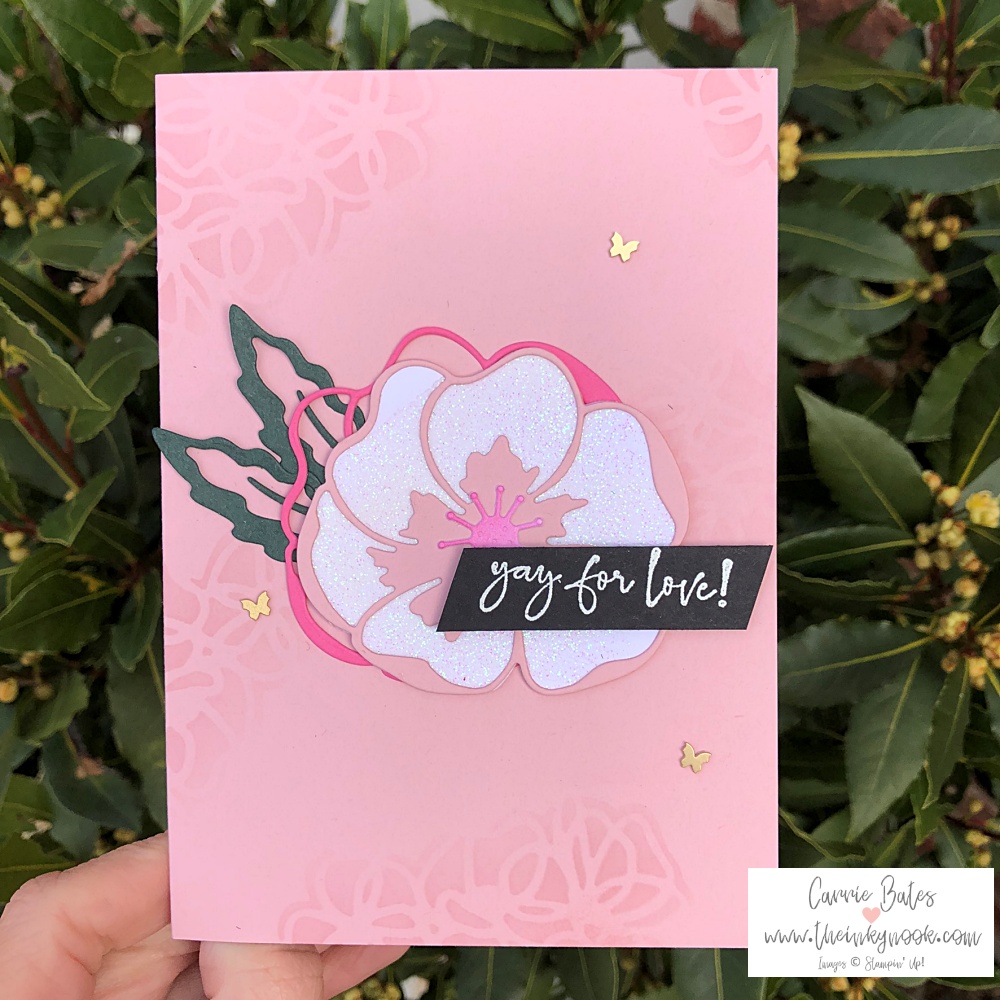
Firstly you need to decide what dies you are going to use and mine are the Poppy Moments dies. My choice is the rectangular shaped frame die in this set. Simply die cut the template out on some offcut cardstock. Taking a blending brush, an ink pad place the mask on your card base. and hold in place. Today I am using the same colour ink as my card base to achieve a more subtle look. Ink up your brush and tap the excess off on your grid paper or any scrap paper. Now in a circular motion begin to brush over the mask and you will see a hint of colour begin to appear. Keep repeating this step until you can see your image by carefully lifting up the mask to check.
I moved the mask around the card base and changed how prominent the underlying images were by using more or less brushing. When you look at the finished card below you can see how some areas look quite faded and others a deeper finish.
Creating the poppy centrepiece
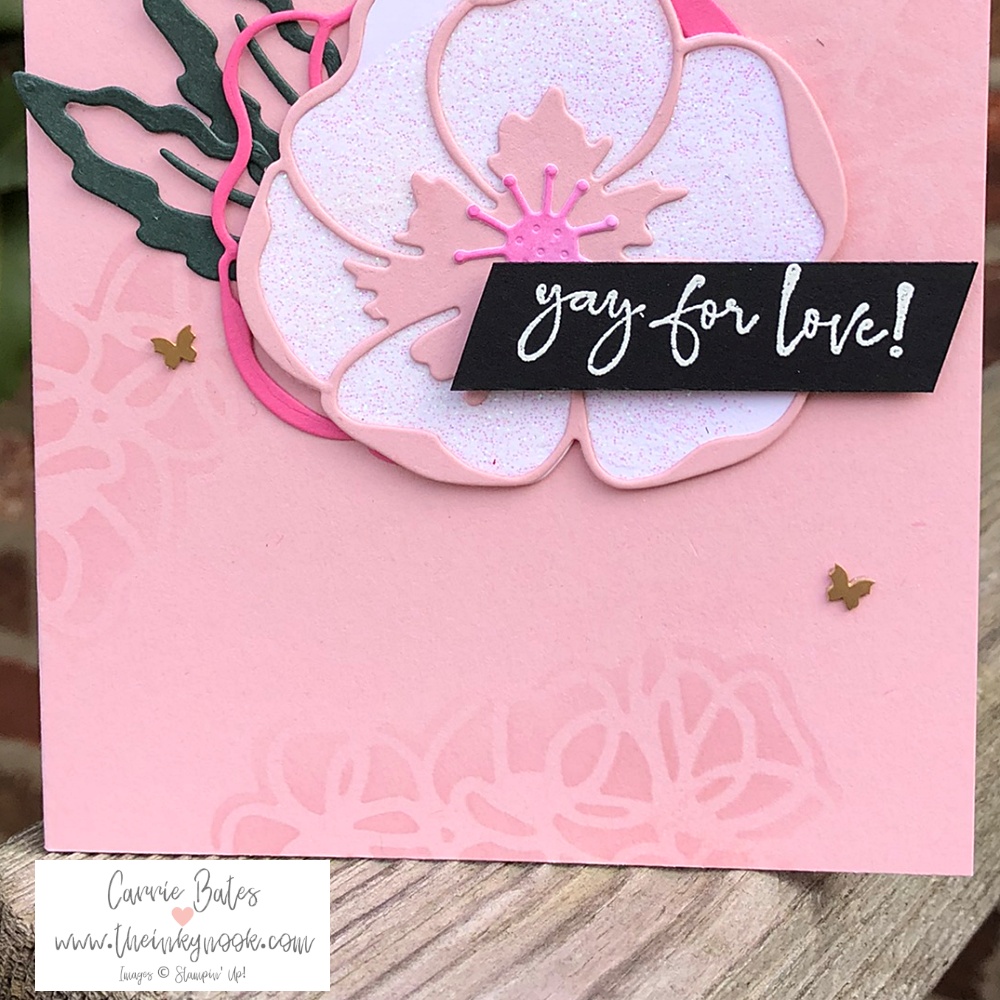
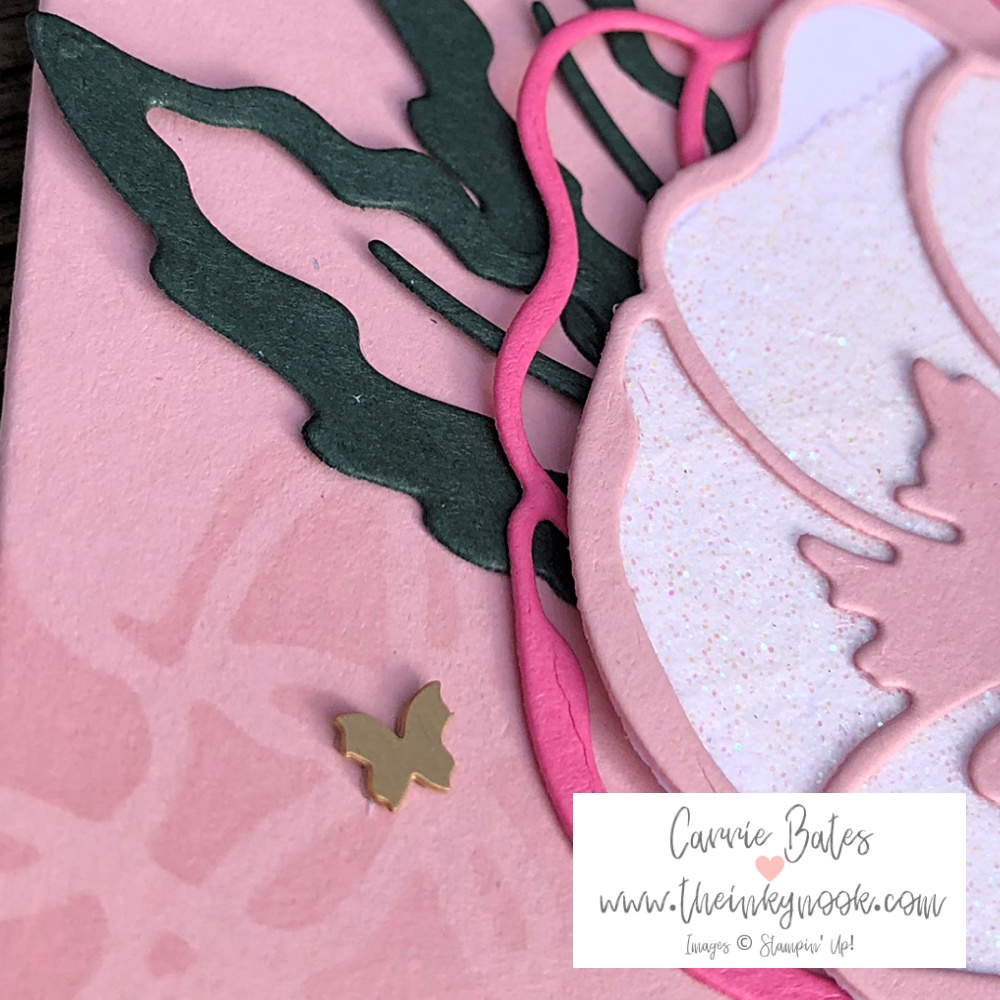
Using the poppy moments dies cut out 2 large poppy outlines, mine are Polished Pink and Blushing Bride. Next I put a layer of shimmery white embossing paste onto white cardstock and leave to dry. Once dry die cut the big poppy out from this shimmery card. This is the bottom of the poppy and you need to glue one of the outlines diecuts to the top of this. Layer up the leaves and remaining poppy outline and glue to the card base. Pop some dimensionals behind the centrepiece and then stick to the card.
Finishing touches
Create your greeting layer on some black card and emboss with white powder as this really pops out from the card.
The brushed brass butterflies come in 2 sizes and I used the smallest ones to just add a little something extra to the overall card. I normally say I like to add a little sparkle to all my projects but I think the brushed brass is very effective here.
Are you ready to see the finished card in full then keep scrolling down for the big reveal ! After the blog hop list I will share a full product list of everything I’ve used on the card.
Thank you so much for joining me today. Have I tempted you to have a go at creating your own masks in your papercrafting now? Please share in the comments below what you like or dislike about the card or the technique. Now do hop around the other ladies blogs to see how they have interpreted the theme.
Inky hugs,
Carrie
Product List


Yay for your card! Its gorgeous!
Thanks Sara and great minds think alike on the masks and paste this month !
That’s a wow card!
Thank you so much for your lovely comment Michele – I hope you will have a go too 🙂
So bold and pretty, fantastic Carrie. x
Thanks Leighsa – it’s a bit more advance than my normal style but I really enjoyed creating more of a ‘wow’ card !
Loving this technique – tfs beautiful as always, Carrie.
Wow thank you Elaine that’s pretty special from a lady of your talents !
Brilliant idea Carrie, really should do this more often – it is so effective!
Heather that means a lot and I’m glad I’ve provided you with some inspiration !
Gorgeous card xx
Thank you for taking the time to read my blog today Katy and hope you will have a go at creating something similar now…
Lovely use of the Poppies dies. A great technique too!
Hi Barbara – thank you for the compliments and I hope you are inspired to have a go with this mask technique !
thank you for sharing this technique Carrie .Your card is beautiful x
Hi Gina and thank you for taking the time to comment today and it’s always good to be reminded about techniques we might have forgotten about or not even tried before.
Wow, I will definitely have a go at this technique, simply stunning.
Thanks Sue – hope you enjoy having a go !
I love your card and technique, thanks for such good information!
Thanks June I love being able to inspire other crafters !