Hey there I thought I’d share how I made this beach hut card on this month’s Stamptastic Friends blog hop. Our theme this month is nauticaI which made me think of the seaside. We love visiting the North Norfolk coast and often book one of the Happy Huts on the beach at Wells-next-the-sea.
I was just about to start making my card for the hop using the Circle Sayings bundle as there are a couple of great nautical stamps in that set. Then I saw the top sheet in the Bright & Beautiful designer series paper (DSP)’waving’ at me next to my grid paper. That’s when I thought beach huts and a beach scene want to know more?

Create the background for the beach hut card
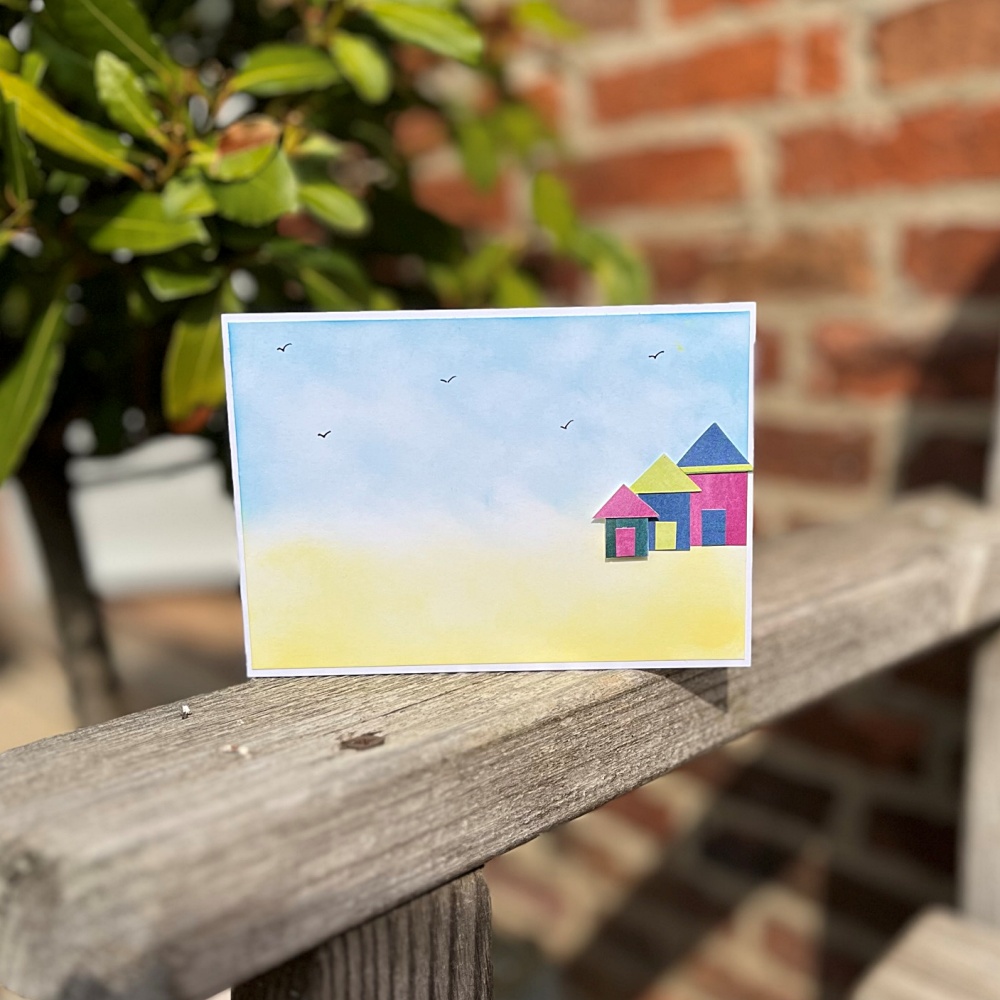
The card base is a standard white cardstock measuring 21cm by 14.9cm and scored at 10.5cm along the long edge. Next I cut a white card layer measuring 14.4cm by 10cm. I picked out Azure Afternoon (sky) and Lemon Lolly (sand) and 2 blending brushes to create the background. The sand was my first layer as this was the lighter colour and I gradually built up the beach. To do this I applied the blending brush from the bottom up towards the middle. There was more brushing at the bottom to create a darker shade and add depth.
The sky was created using the Azure Afternoon in the same way as the sand but working from the top down to the middle to meet the sand. I think the Lemon Lolly and Azure Afternoon coordinate beautifully to give a real soft beach landscape.
Make the beach huts
When adding elements to a card I like to work with the rule of 3 as it balances the card out. So you’ve guessed it – I needed 3 beach huts for this card.
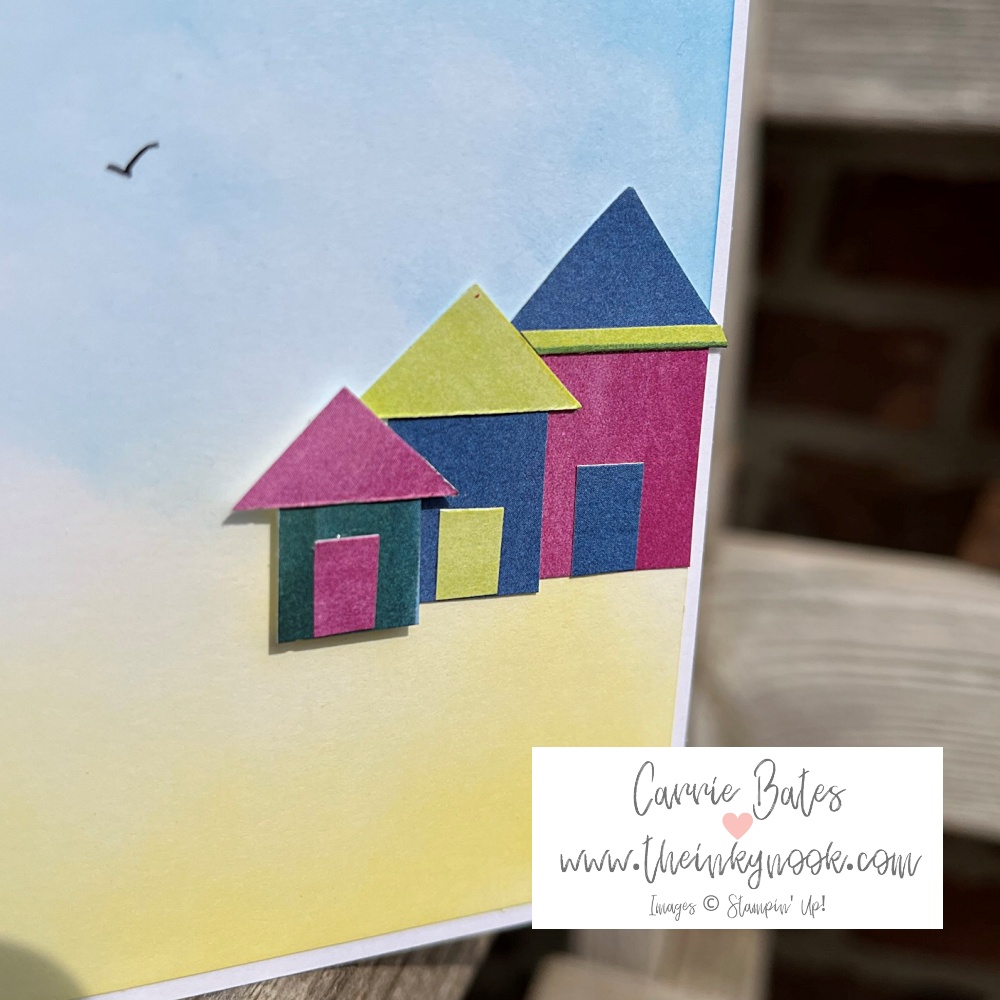
Taking the multicoloured stripe sheet out of the DSP I hand cut 3 different sized huts roughly in a square shape. Mine are big, medium and small sized to create dimension to the card. To create the roofs and door I picked contrasting colour stripes from the same sheet. For the roofs I cut a slightly bigger square/rectangle than the hut base and then cut this diagonally in half. The doors were hand cut again to be in proportion to the hut base. I then glued each hut together and popped to one side.
Assembling the card
Firstly glue the background layer to the card base. Secondly, layer up the beach huts on the card and glue into place but for the smallest beach hut used mini dimensionals. To add a finishing touch I used a basic grey marker to draw on some seagulls which is easy to do. It’s like creating the letter “v” but adding a little curve to the top of the letter.
I hope you agree this is quite a simple card to make with relatively few cardmaking materials. Thank you for joining me and I’d love it if you left me some feedback in the comments before you hop around and see what the other ladies have created.
Until next time, inky hugs,
Carrie x
PS Shop the designer series paper sale on selected packs until 30th June 2023
Beach hut card product list Designer Series Paper")


Your card is so creative. I want to visit that beach and stay in a little house!