Welcome to this month’s Stamptastic Friends blog hop where the theme is to share our favourite colouring method. One of mine is to use blending brushes for colouring images and creating backgrounds for my cards.

What do I need to get started?
It’s relatively simple you need an ink pad(s), white or vanilla cardstock and a blending brush or two. For my project today I am just using the Pretty Peacock ink pad with white card. I would say this works better with dark colours but if you want to use 2 or 3 then try and pick a dark, mid and light tone selection.
Dab the blending brush on your ink pad 2 to 3 times to pick up some ink and then just tap it onto some scrap paper. This is a tip to stop you getting a “splodge” of ink on your card when you start to blend on your card. My preferred brush motion is small sweeping circles from left to right across the cardstock.
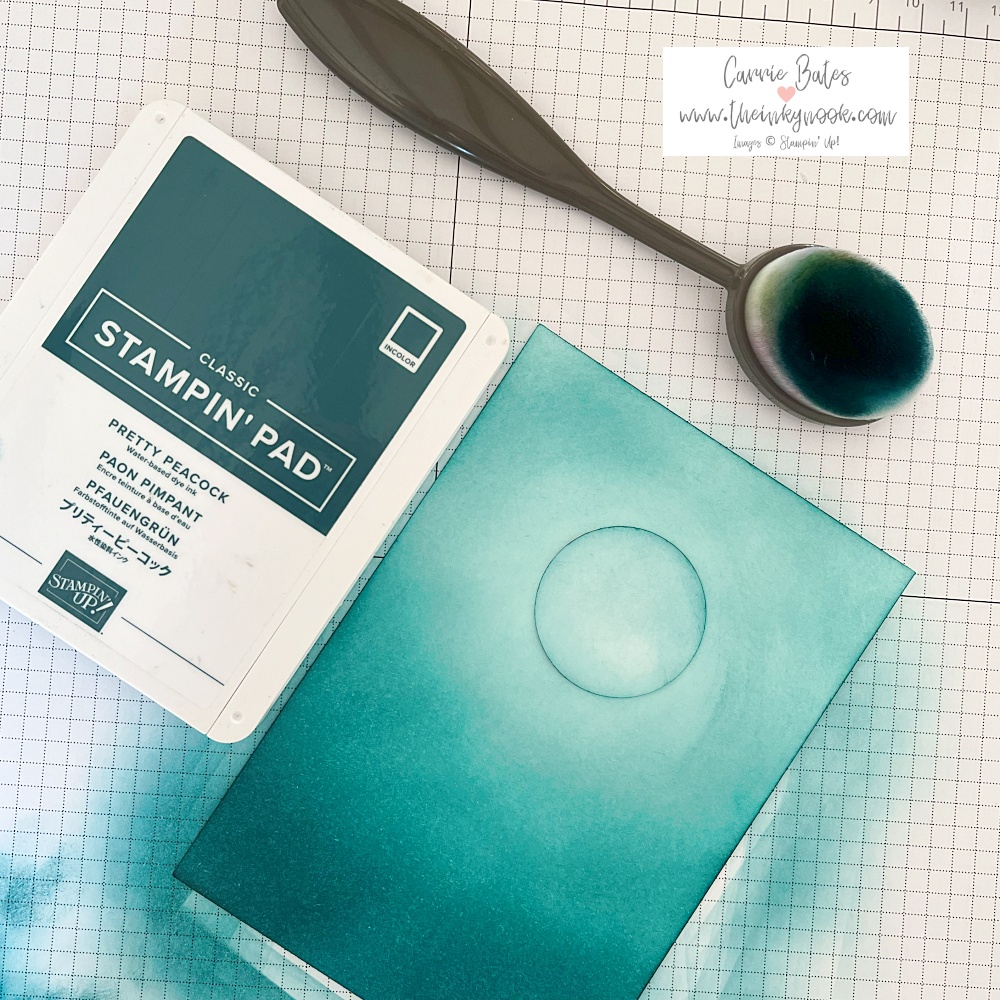
Repeat this across the whole card moving from bottom to top. Once you have covered the whole card layer repeat the process from the bottom but only go so far up. Then repeat again but finish lower than you did the previous time. Keep on repeating until you can really see the dark shading filtering out to the lighter shades at the top.
Next steps
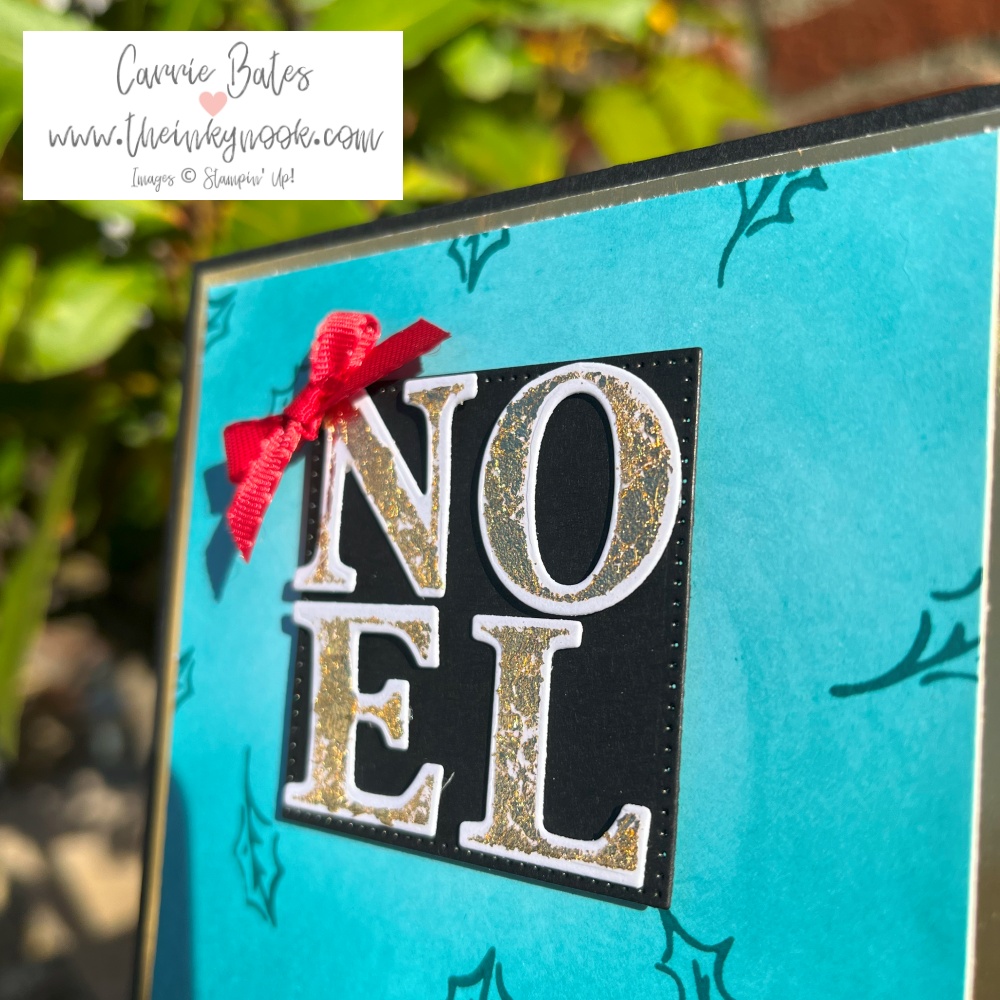
Taking the 2 holly leaf stamps I randomly stamped over the blended layer using the Pretty Peacock ink pad again. Next I stamped and die cut the “NOEL” wording. The gilded leafing adds a touch of luxury to this Christmas card but that’s a technique for another blog post. I hope you like it’s luxurious look though? The letters are then mounted with glue dots onto a stitched square layer (die cut using the Stylish Shapes dies). The little red ribbon in the corner is just an added finishing touch.
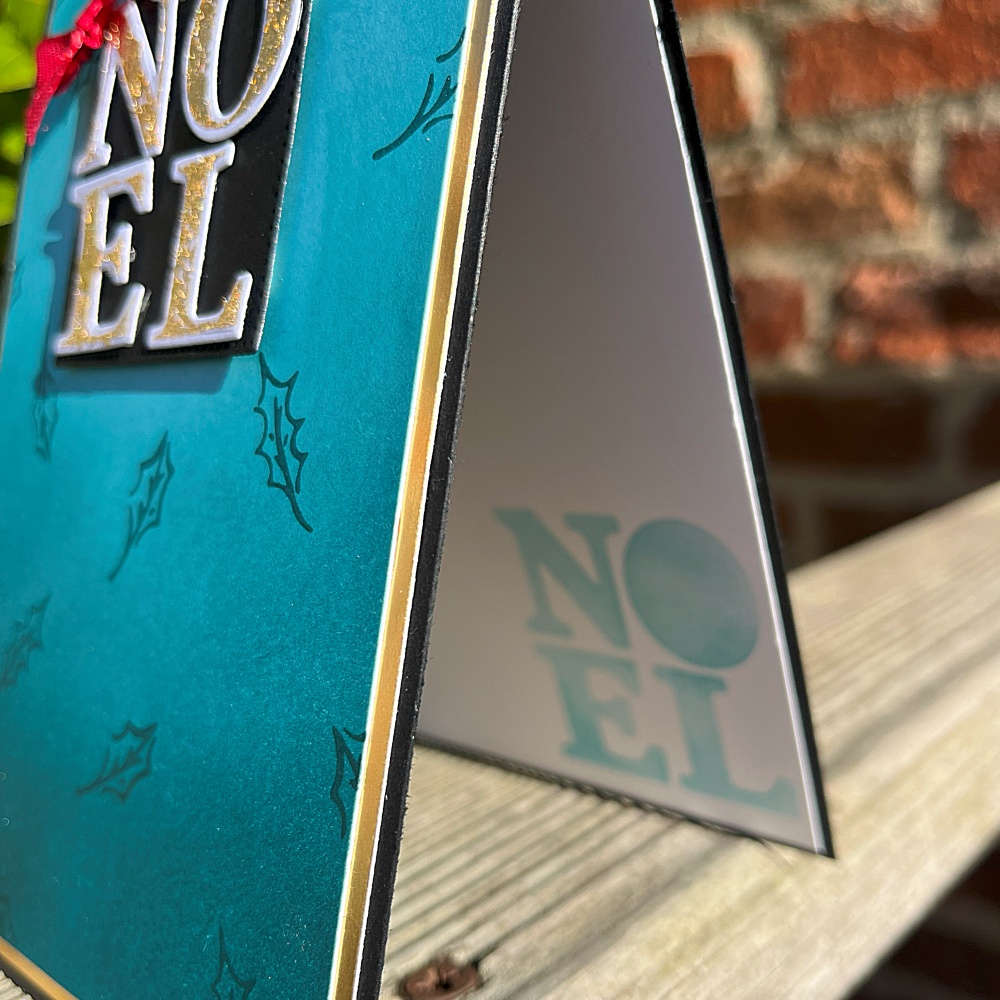
Inside layer and how to use blending brushes
Not wasting the leftover die cut for the NOEL I used it as a mask with the blending brush on the inside layer. Here I have been quite light with the blending as I don’t want it to over power the inside where I will be writing my Christmas greeting.
Thanks for joining me today and I’d love to hear what you think of how to use the blending brushes or if you have any questions about blending. Please do hop around the rest of the blog hop and see what the other talented team members have shared as their favourite colouring method.
Inky hugs, Carrie x
Product List")