Welcome to the monthly Stamptastic Friends blog hop where today’s theme is to “CASE” a project from someone on our design team. Now CASEing someone’s card is a crafting term defined as “copy and share everything”. This essentially means you re-creating a card you’ve seen someone else make and adding your own interpretation. I instantly remembered an easy fun fold card that our talented, Heather Thomas, had shared a few months back. Therefore as I’m in the midst of making my Christmas cards I’ve gone with a Christmas version of Heather’s card. You can view her original post here and her card uses the Zany Zoo suite.
What supplies do you need to make the card?
A piece of cardstock measuring 14.5cm by 21cm, another piece of the same colour cardstock measuring 10.5cm by 7cm, a piece of white cardstock measuring 10cm by 6.5cm. You also need three pieces of DSP (designer series paper). Next, cut two pieces of DSP measuring 14cm by 5cm and one piece measuring 14cm by 3.5cm. In addition, I am adding a gold foil sheet layer in the middle which measures 10.25cm by 6.75cm. You may need some offcuts of white cardstock for any stamped images and greetings you wish to add.
How to make the easy fun fold card
Firstly, take the biggest piece of cardstock this is your card base and on the long side at 5.5cm, 8.5cm, 12.5cm and 15.5cm. The outer two folds should be valley folds and the inner two folds should be mountains. Use the the below picture to help you visualise how these folds look.

Secondly, glue your designer series paper onto the card base with the smallest piece going on the middle panel.
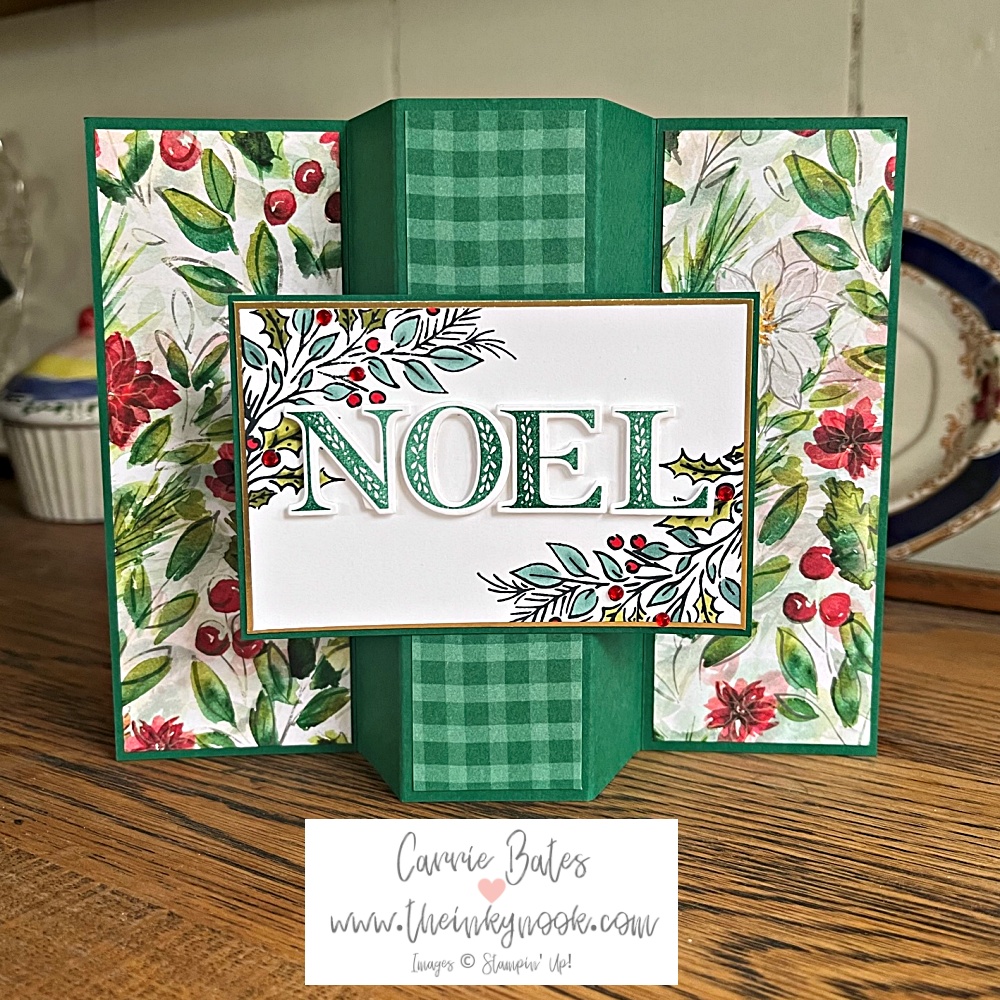
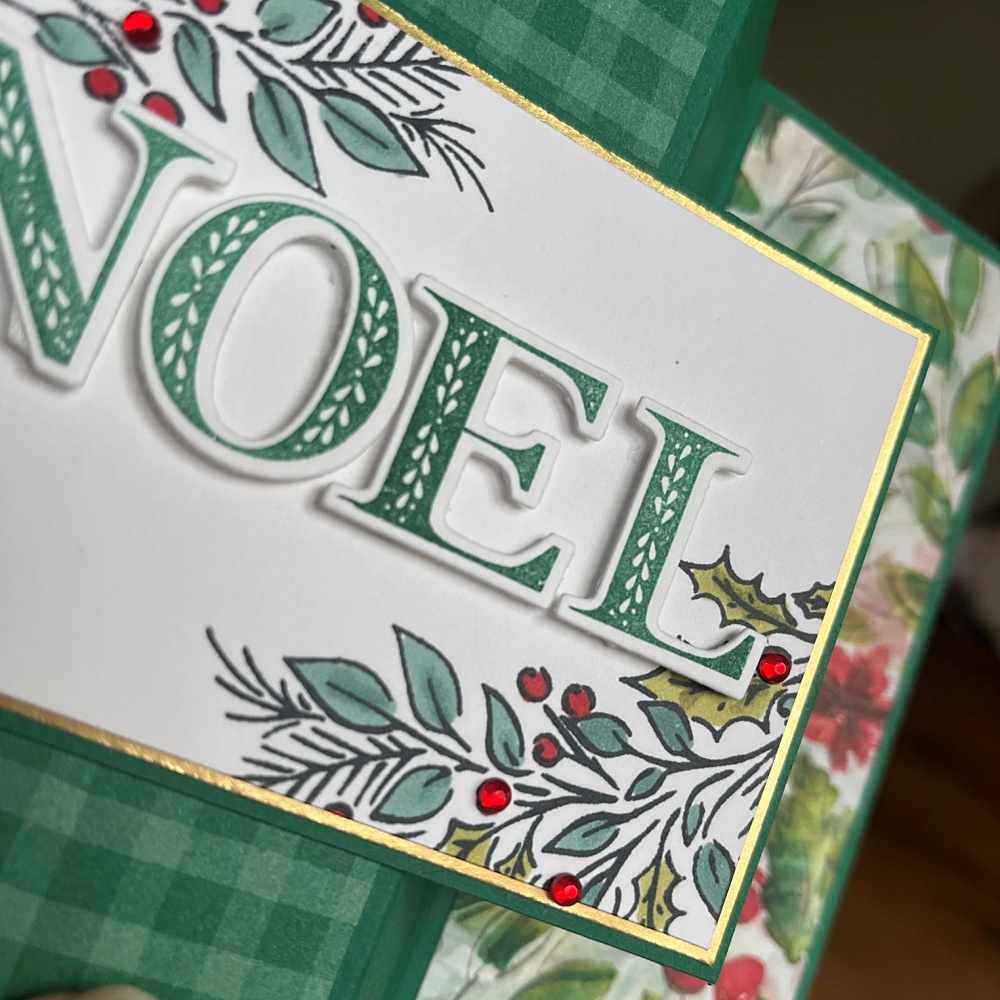
Thirdly, create the focal point of the card which is your middle panel. Glue the white and remaining coloured cardstock layers together and then glue to the middle section of the card base. I partially stamped the holly/leaf images onto my white layer and coloured with stampin’ blends.
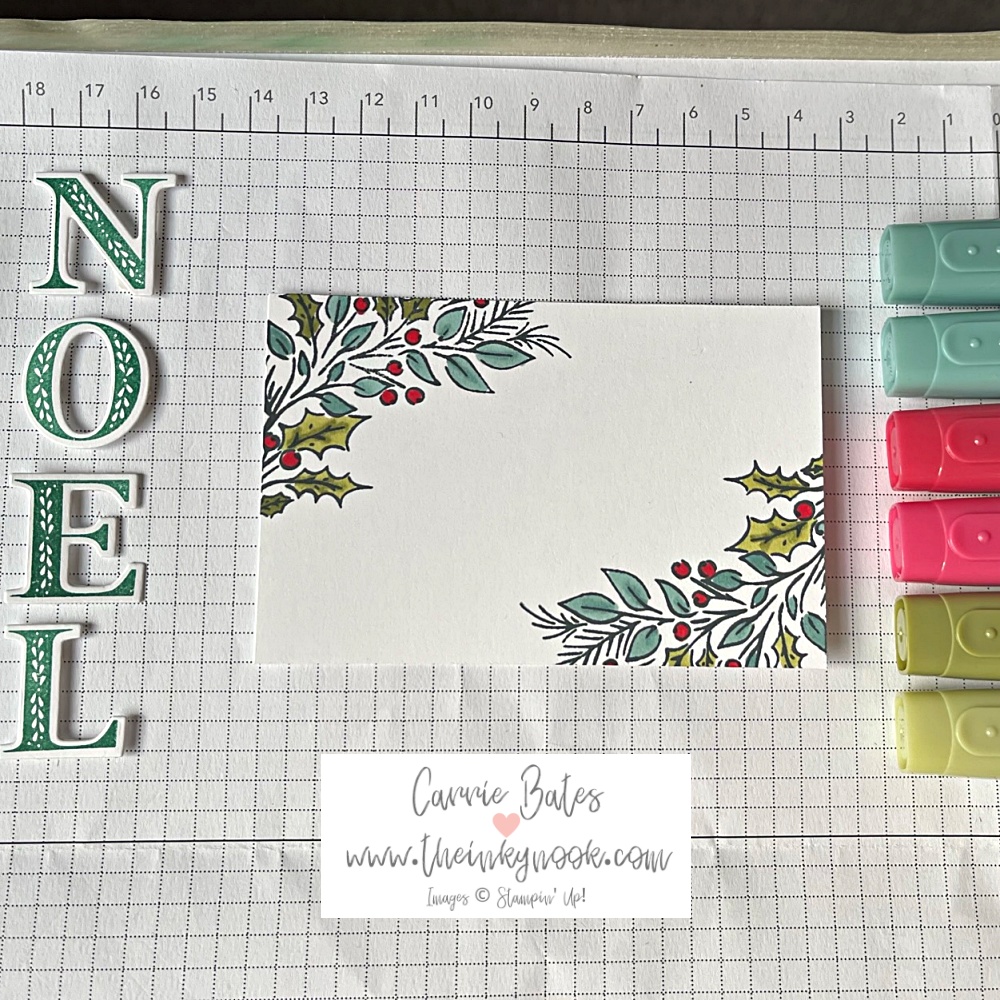
The “NOEL” was stamped in Shaded Spruce onto white cardstock and cut out with the coordinating dies. There is a full supply list at the bottom of my post if you want to know more. The letters were then stuck on using mini dimensionals (foam pads).
Finishing touches
To finish the card off I added some red rhinestones to the “berries” on the front to give a little sparkle.
Can you think of some DSP you’d like to use to have a go at CASE-ing this card yourself?
Please hop around the rest of the blog for more cardmaking inspiration and feel free to leave a comment below of what you think.
Until next time….
Inky hugs, Carrie x
Easy fun fold Christmas card product list")
 Designer Series Paper")


Beautiful Christmas card fun fold. Love the way you have CASEd Heather’s original card and made it your own.
Thanks Tricia – it was a bit daunting taking on an Artisan Team members project but I’m happy with how it turned out.